Make Your Own Carpet Stair Treads

DIY carpet stair treads 2

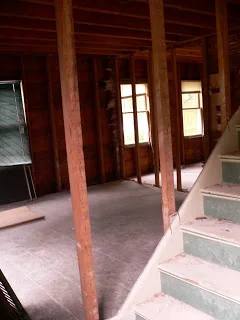
A few years ago we purchased a fixer upper (and that's putting it nicely). It actually was completely not habitable. Although most of it is finished, there are still a couple projects I've been wanting to get around to. One of them was to put a runner carpet down the front stairs. I priced the runner carpets and at minimum it was going to run us a few hundred dollars. If we wanted anything other than the basic run of the mill variety it was going to cost even more money. 

Not being willing to spend that much, I put my thinking cap on. My daughter and I took a trip to our local salvage store, Mardens. They have upholstery fabric for unbelievable prices. I figured there has got to be a way to use that to make my own DIY stair carpet treads. So in taking a walk around the store, I found these:

DIY Carpet Stair Treads

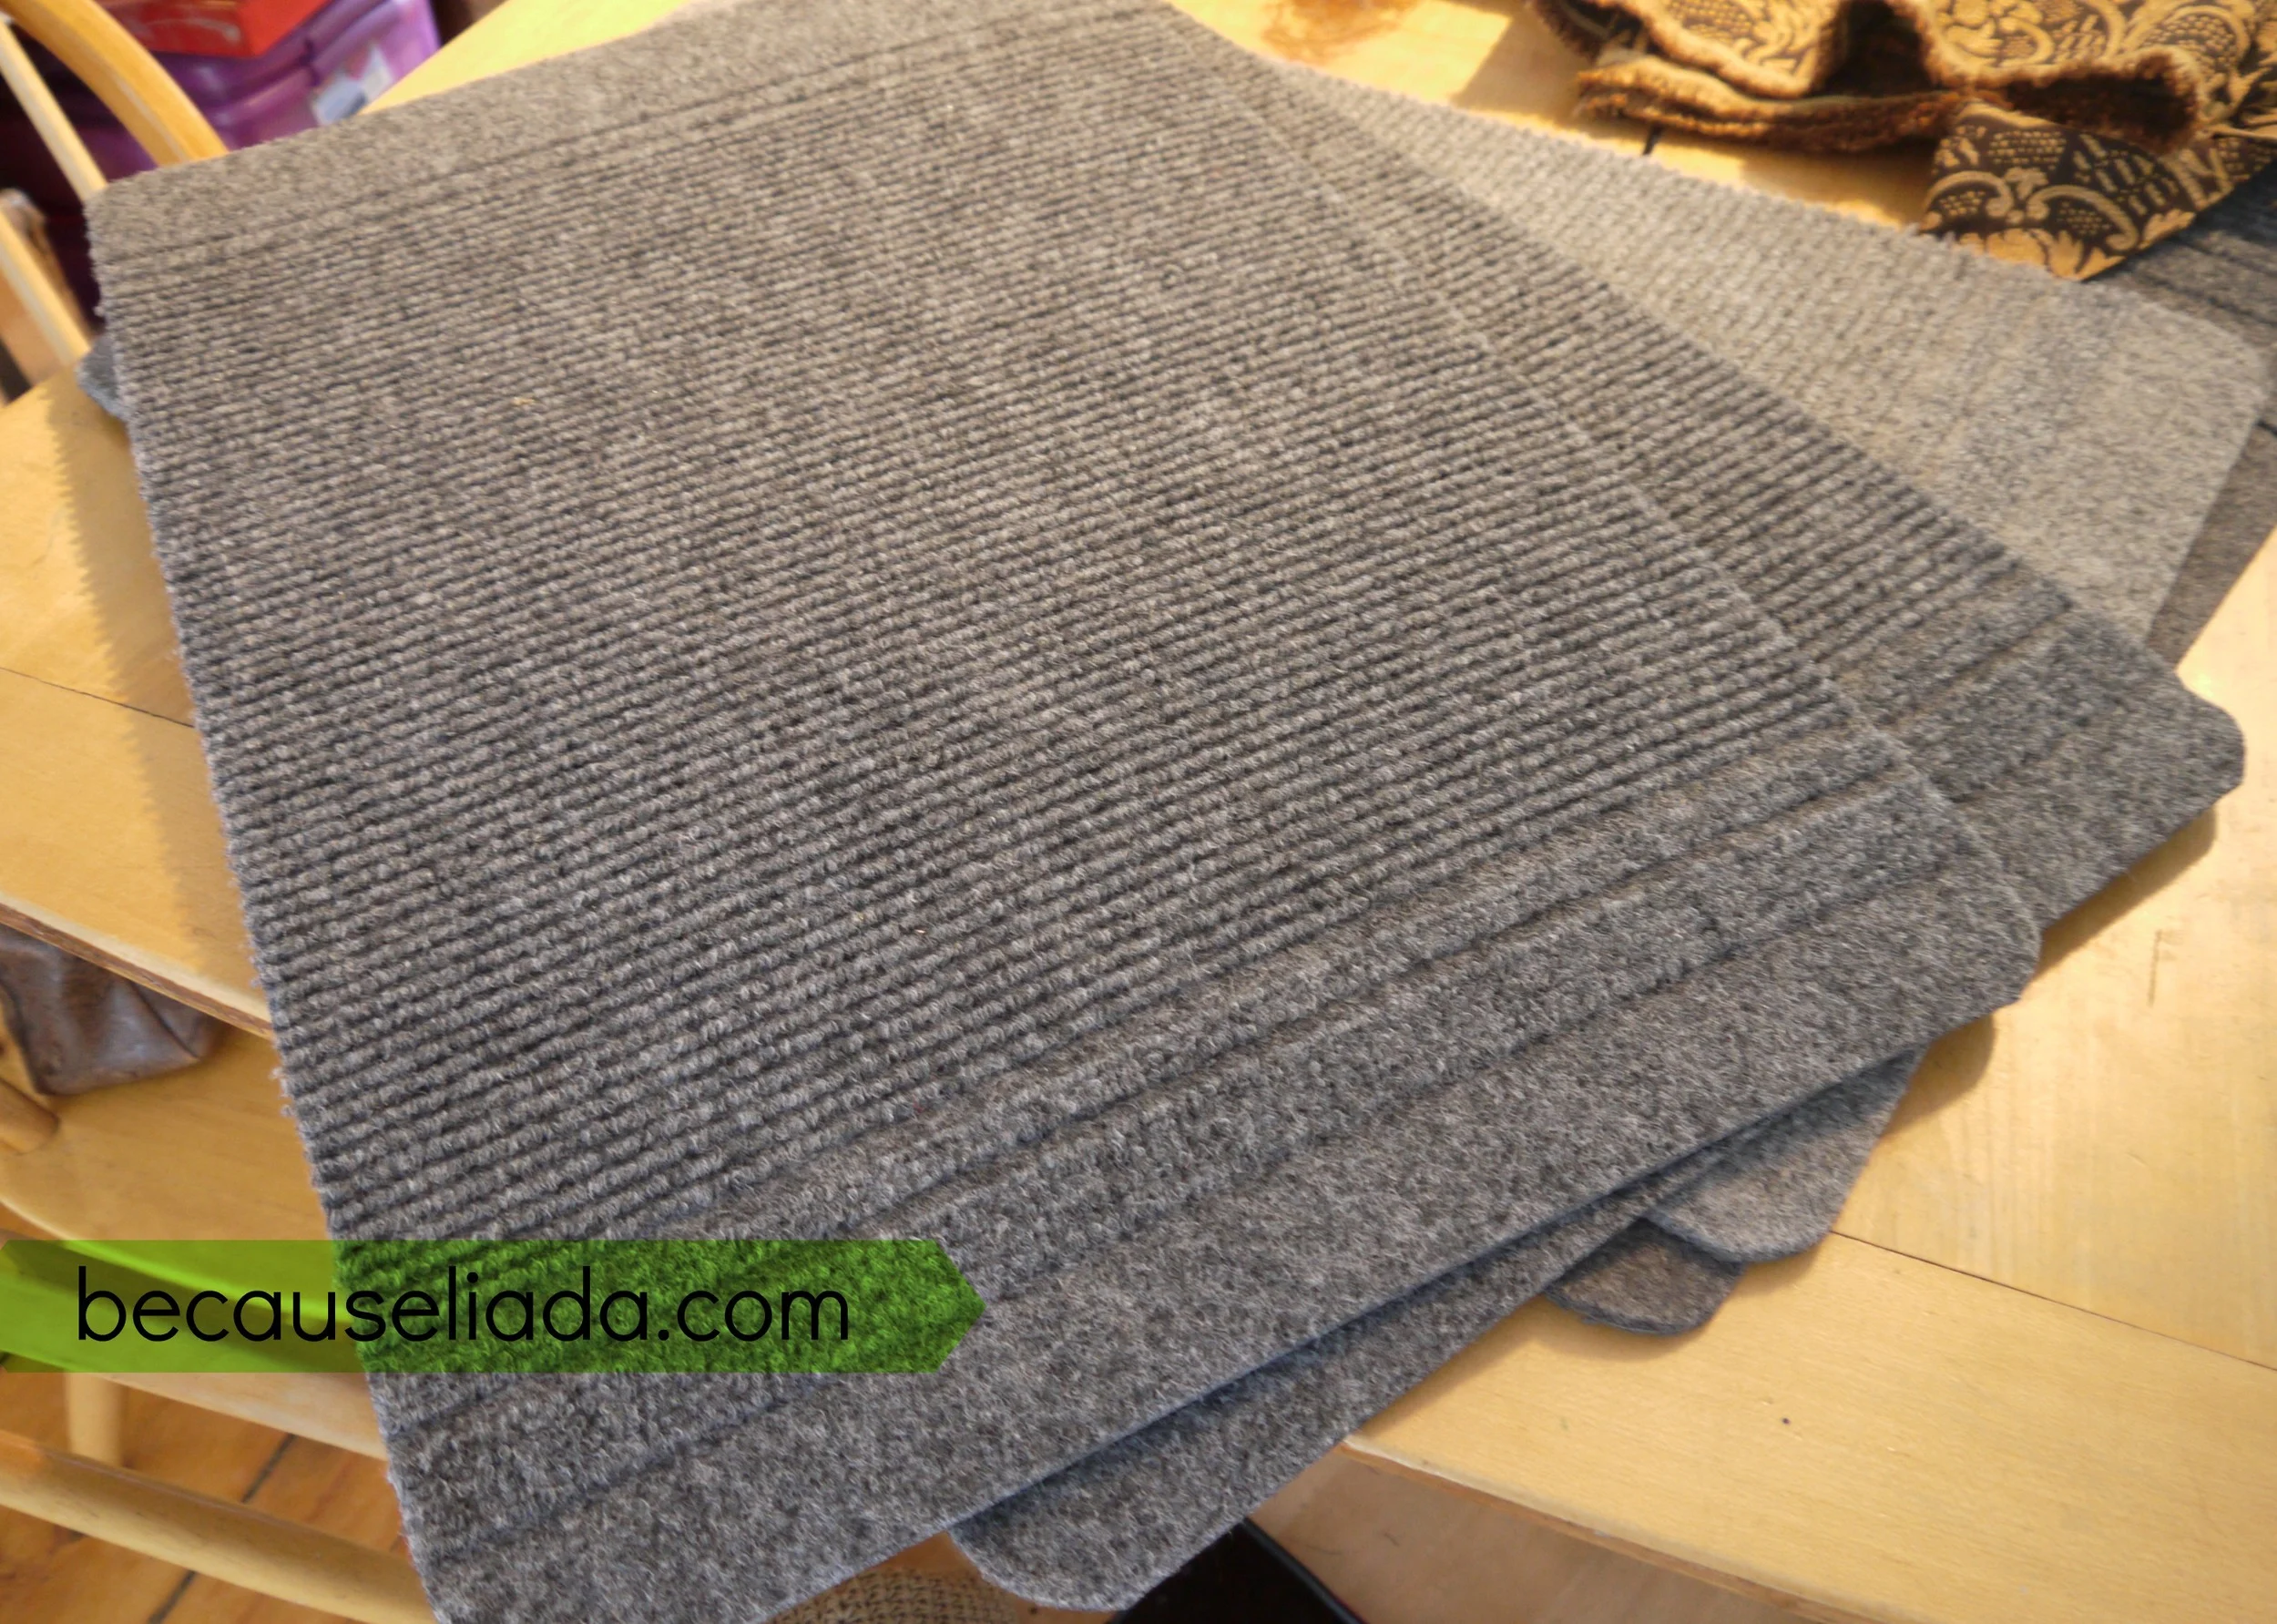
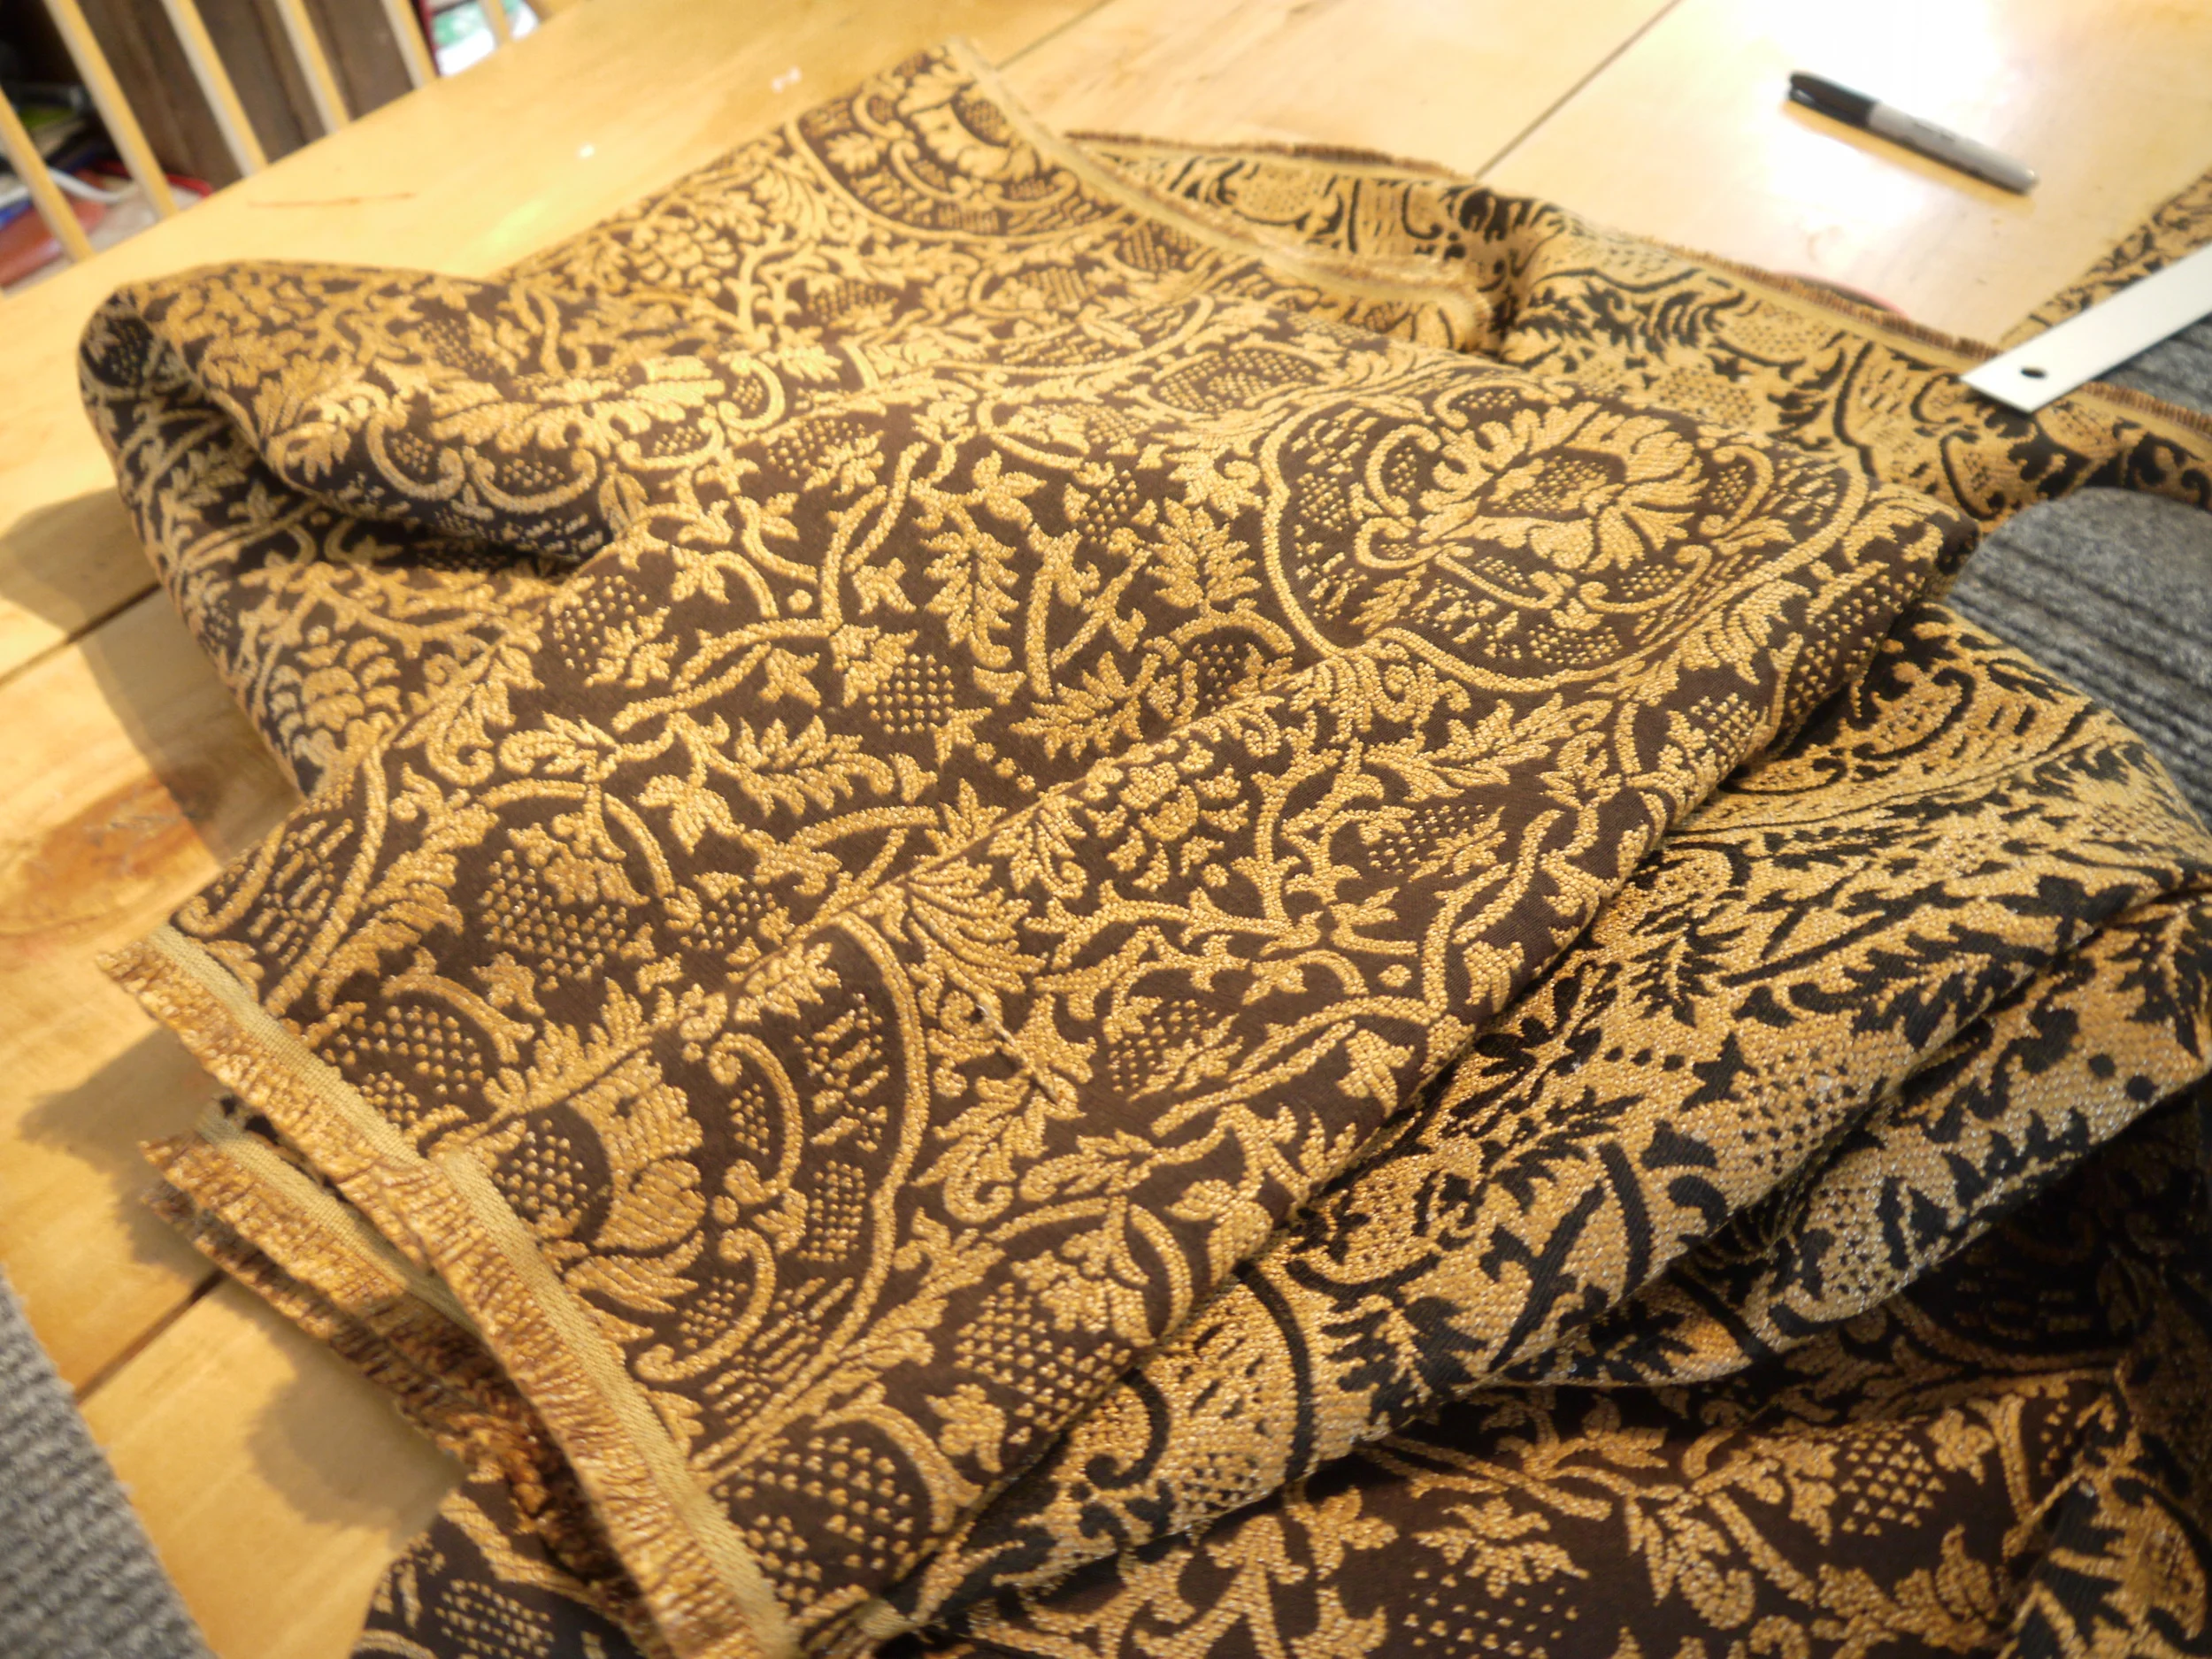
These little rugs were selling for $1.00 each. I measured them and they were the perfect length, but they were too wide. Each little rug cut in half the long way however would give me two perfect sized pieces to make my own Carpet Tread Rugs.  I then headed to the fabric department to see if they had a fabric I would like. I found this lovely fabric for $4.99 per yard. I needed three yards. I think I actually could have done with two and a half but felt safer going with three.

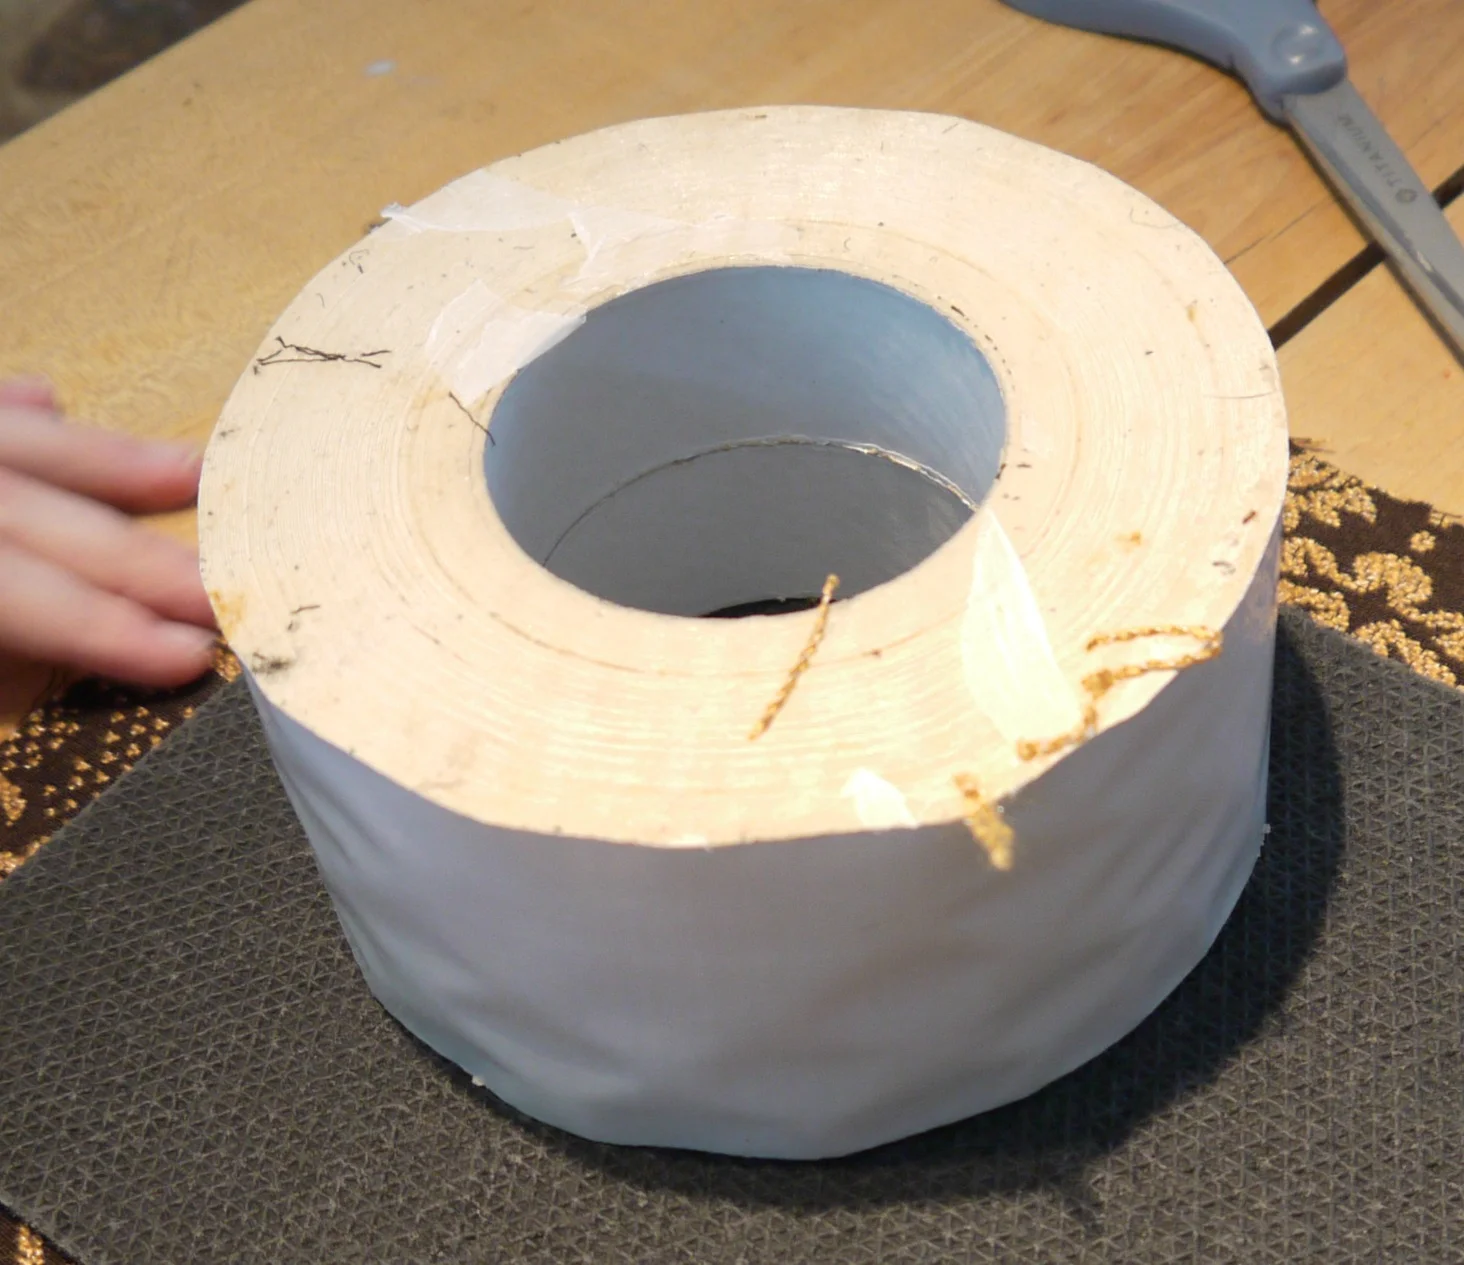
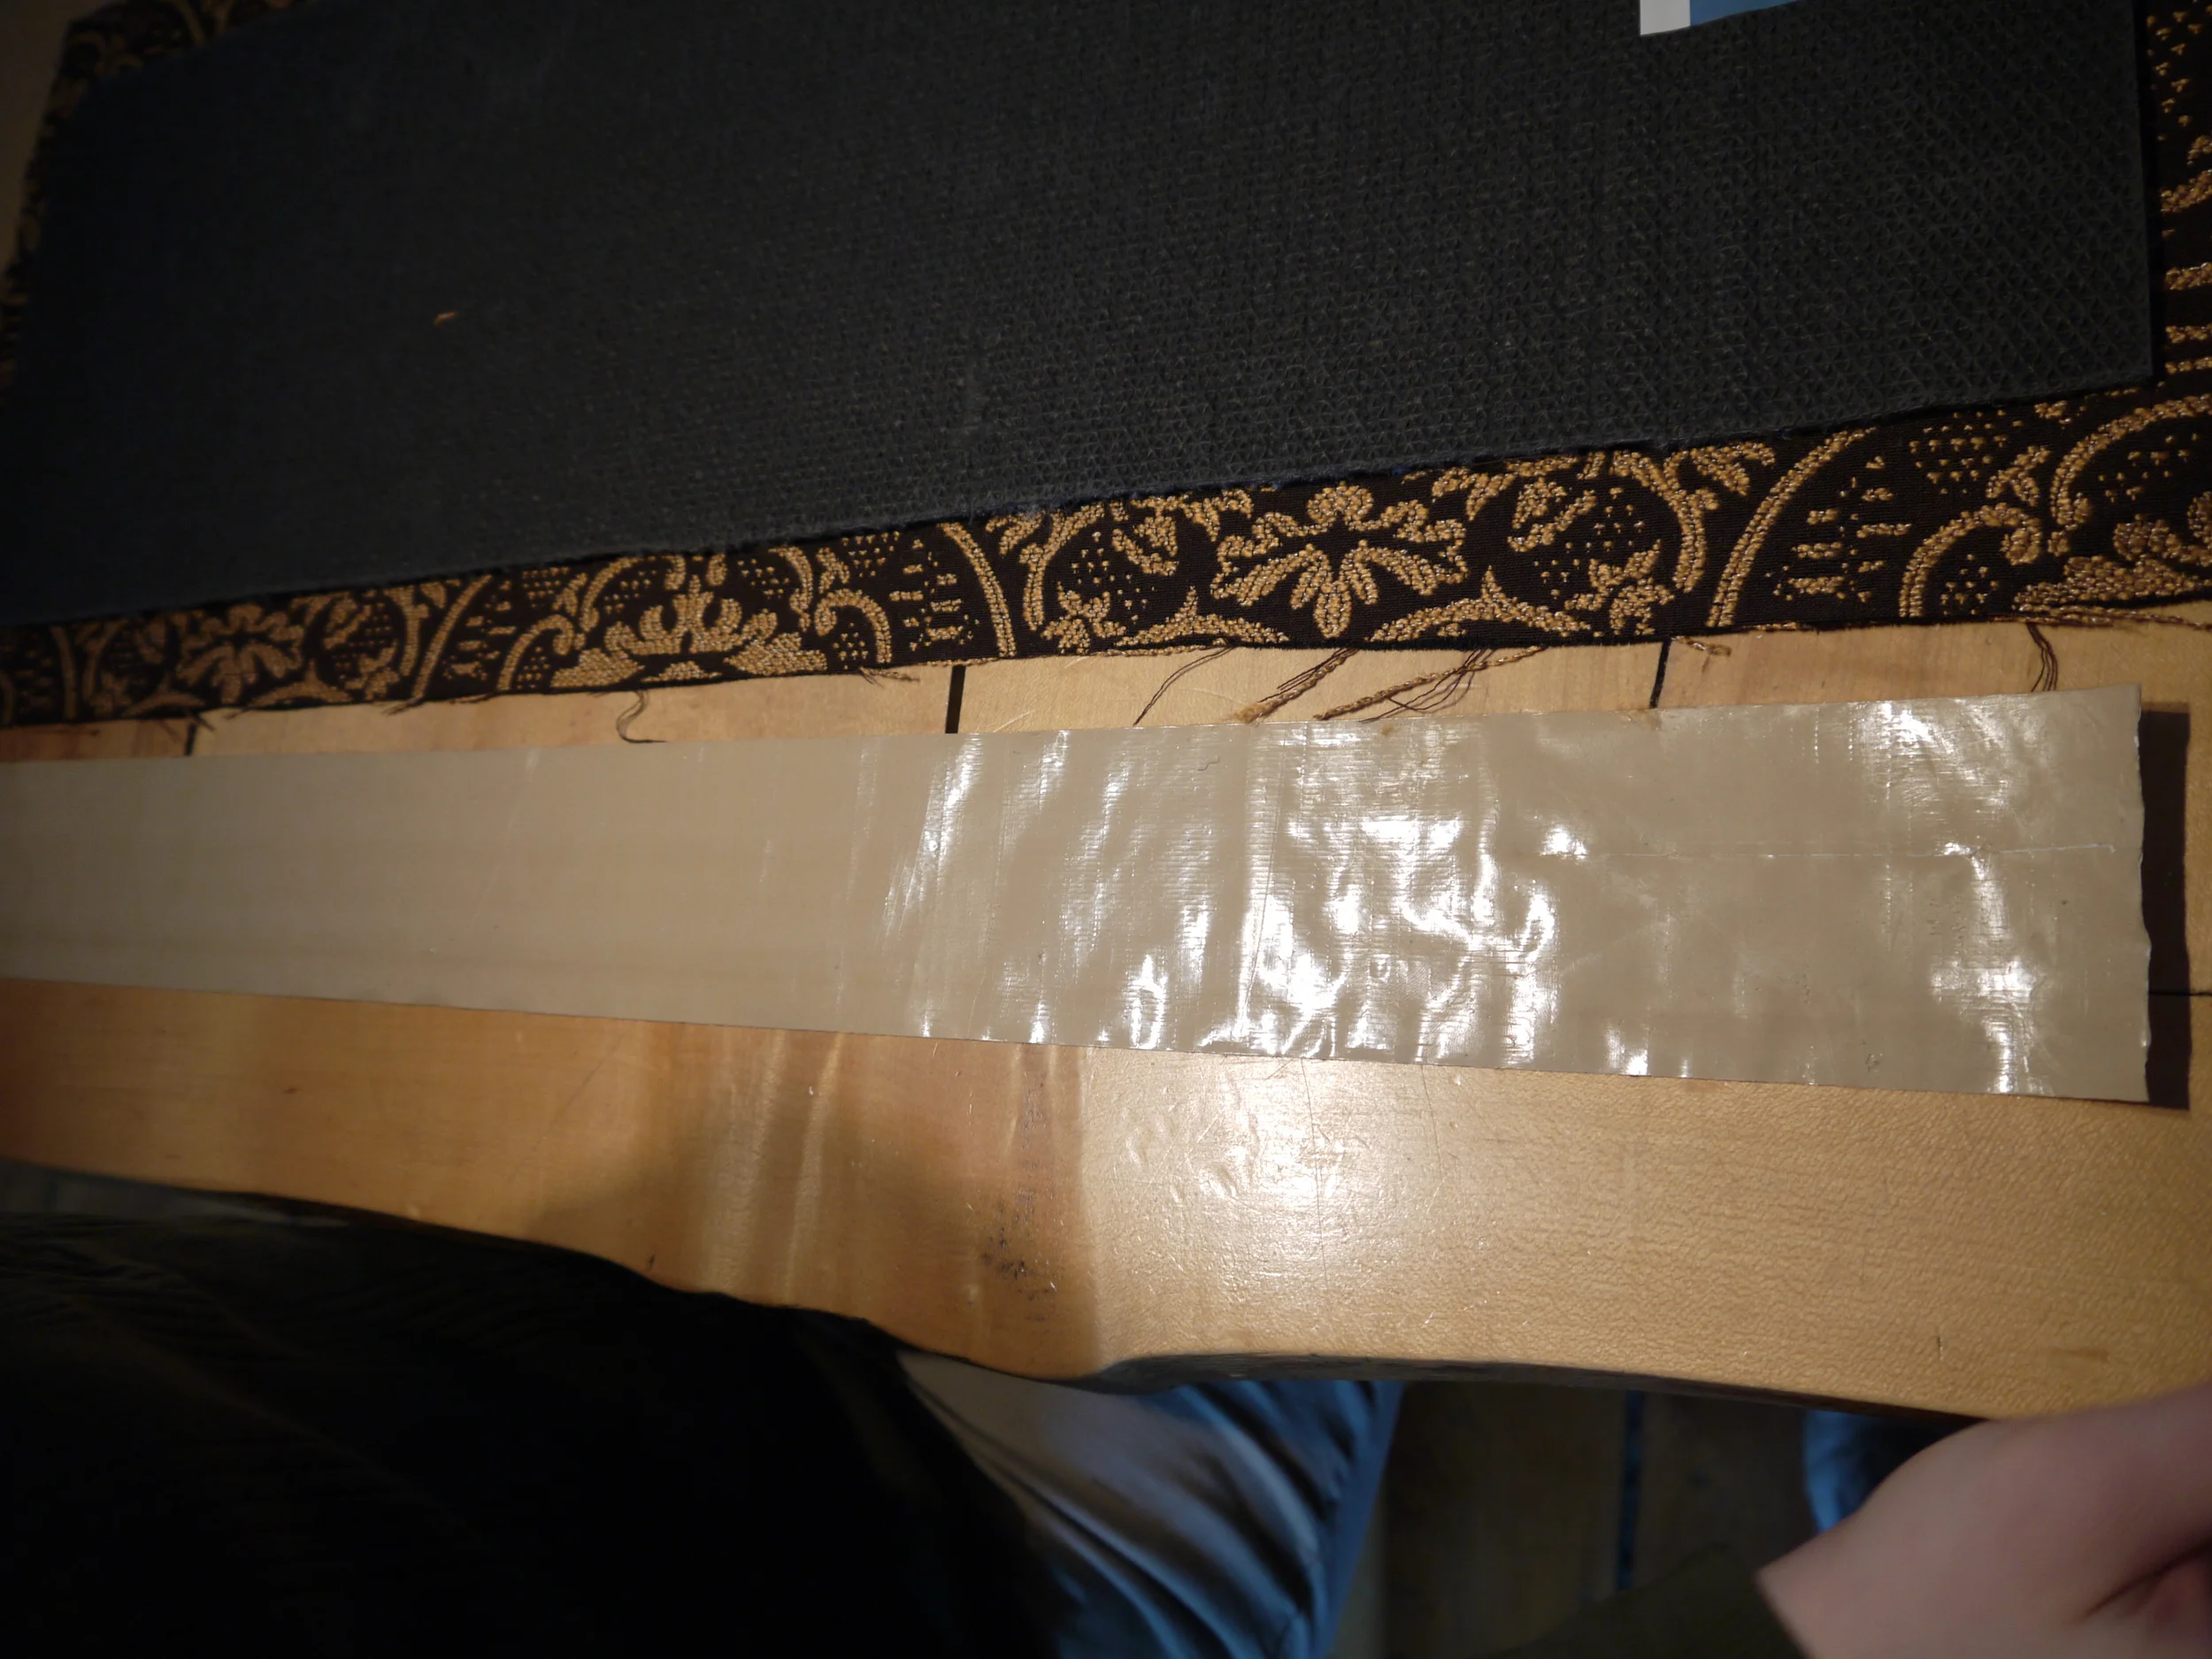
We then had to figure out a way to adhere the upholstery fabric to the rubber backed carpet pieces. In looking around the store my daughter and I found two things, glue and tape...crazy strong tape. I don't know what the tape is used for but the stickiness of it makes duct tape seem like a wimp. Sorry duct tape, I still love you and was going to use you if I had not come across your bigger, stronger, super hero cousin. I know someone will ask but I have no idea what this tape is.  Mardens is a salvage store, this role had no packaging and looked just like this when we bought it. But it was huge and the price was right at $3.49. 

Make Your Own Carpet Stair Treads

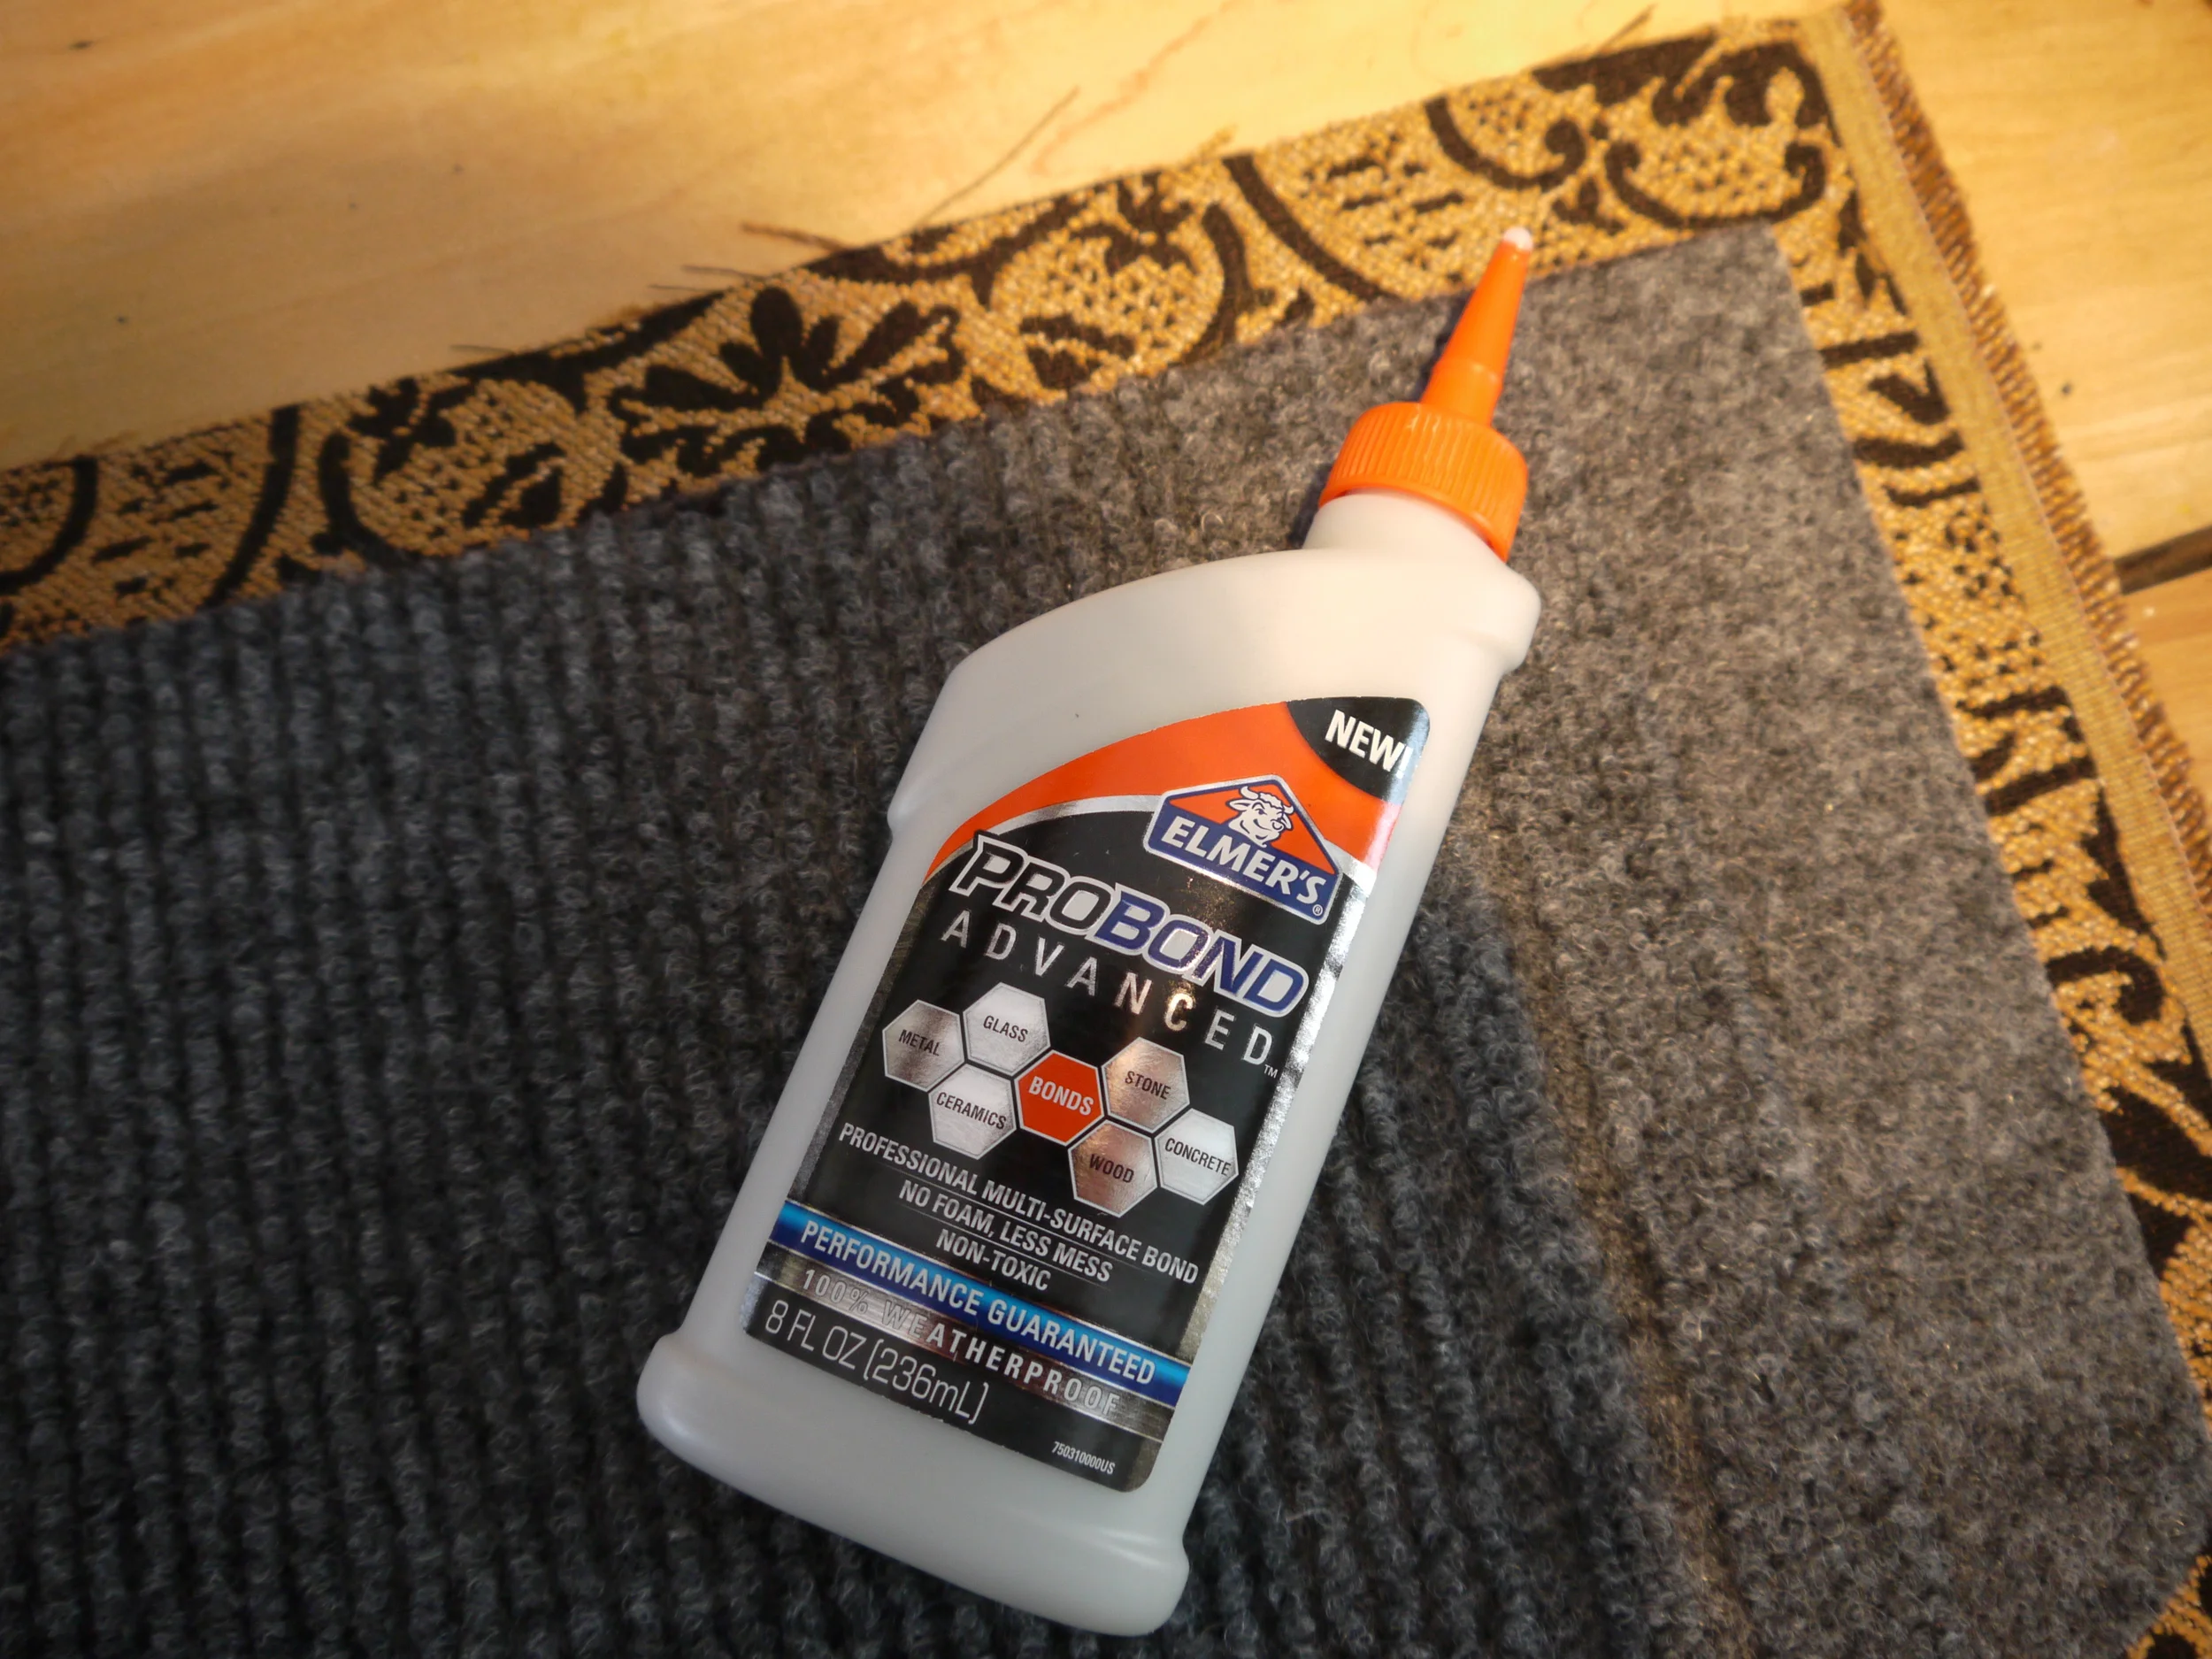
We purchased two bottles of this glue which said it worked on fabric at $5.99 per bottle, it was not enough glue. We ended up running to the hardware store which of course did not carry it, so we purchased a bottle of Weldbond which also said it worked on fabric. It also was $5.99 per bottle. 

DIY Stair Carpet Tread Pads

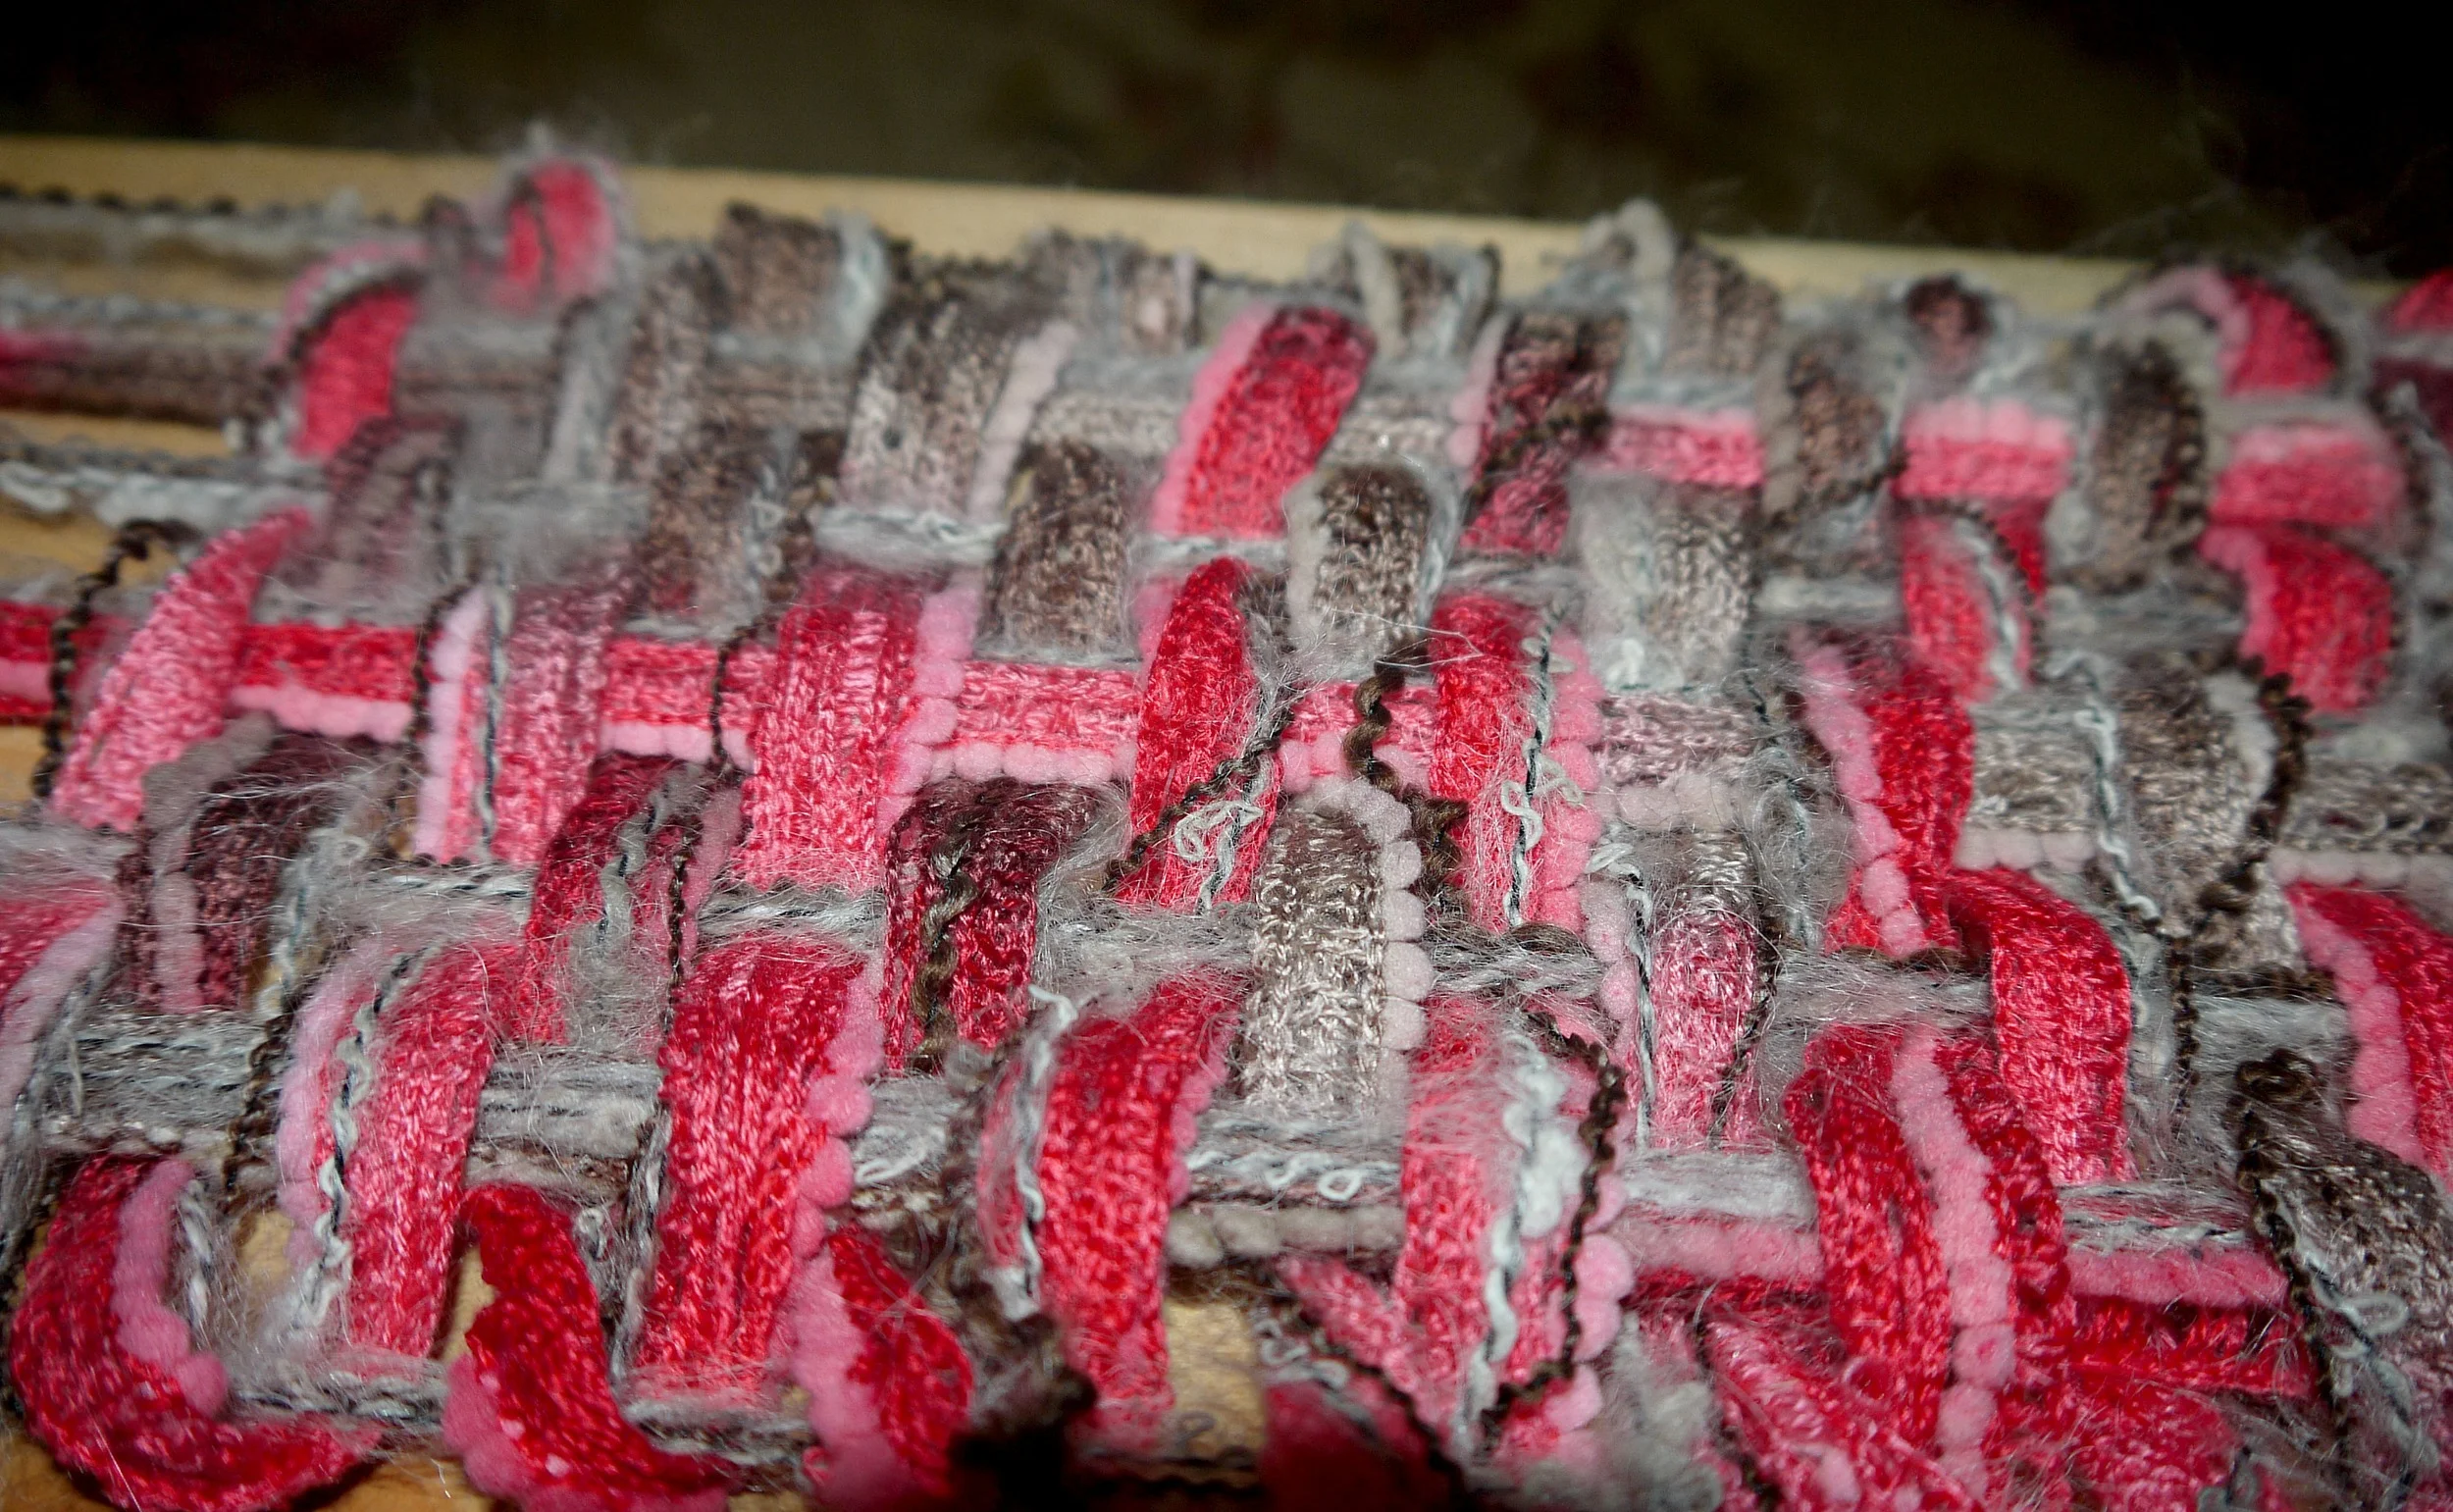
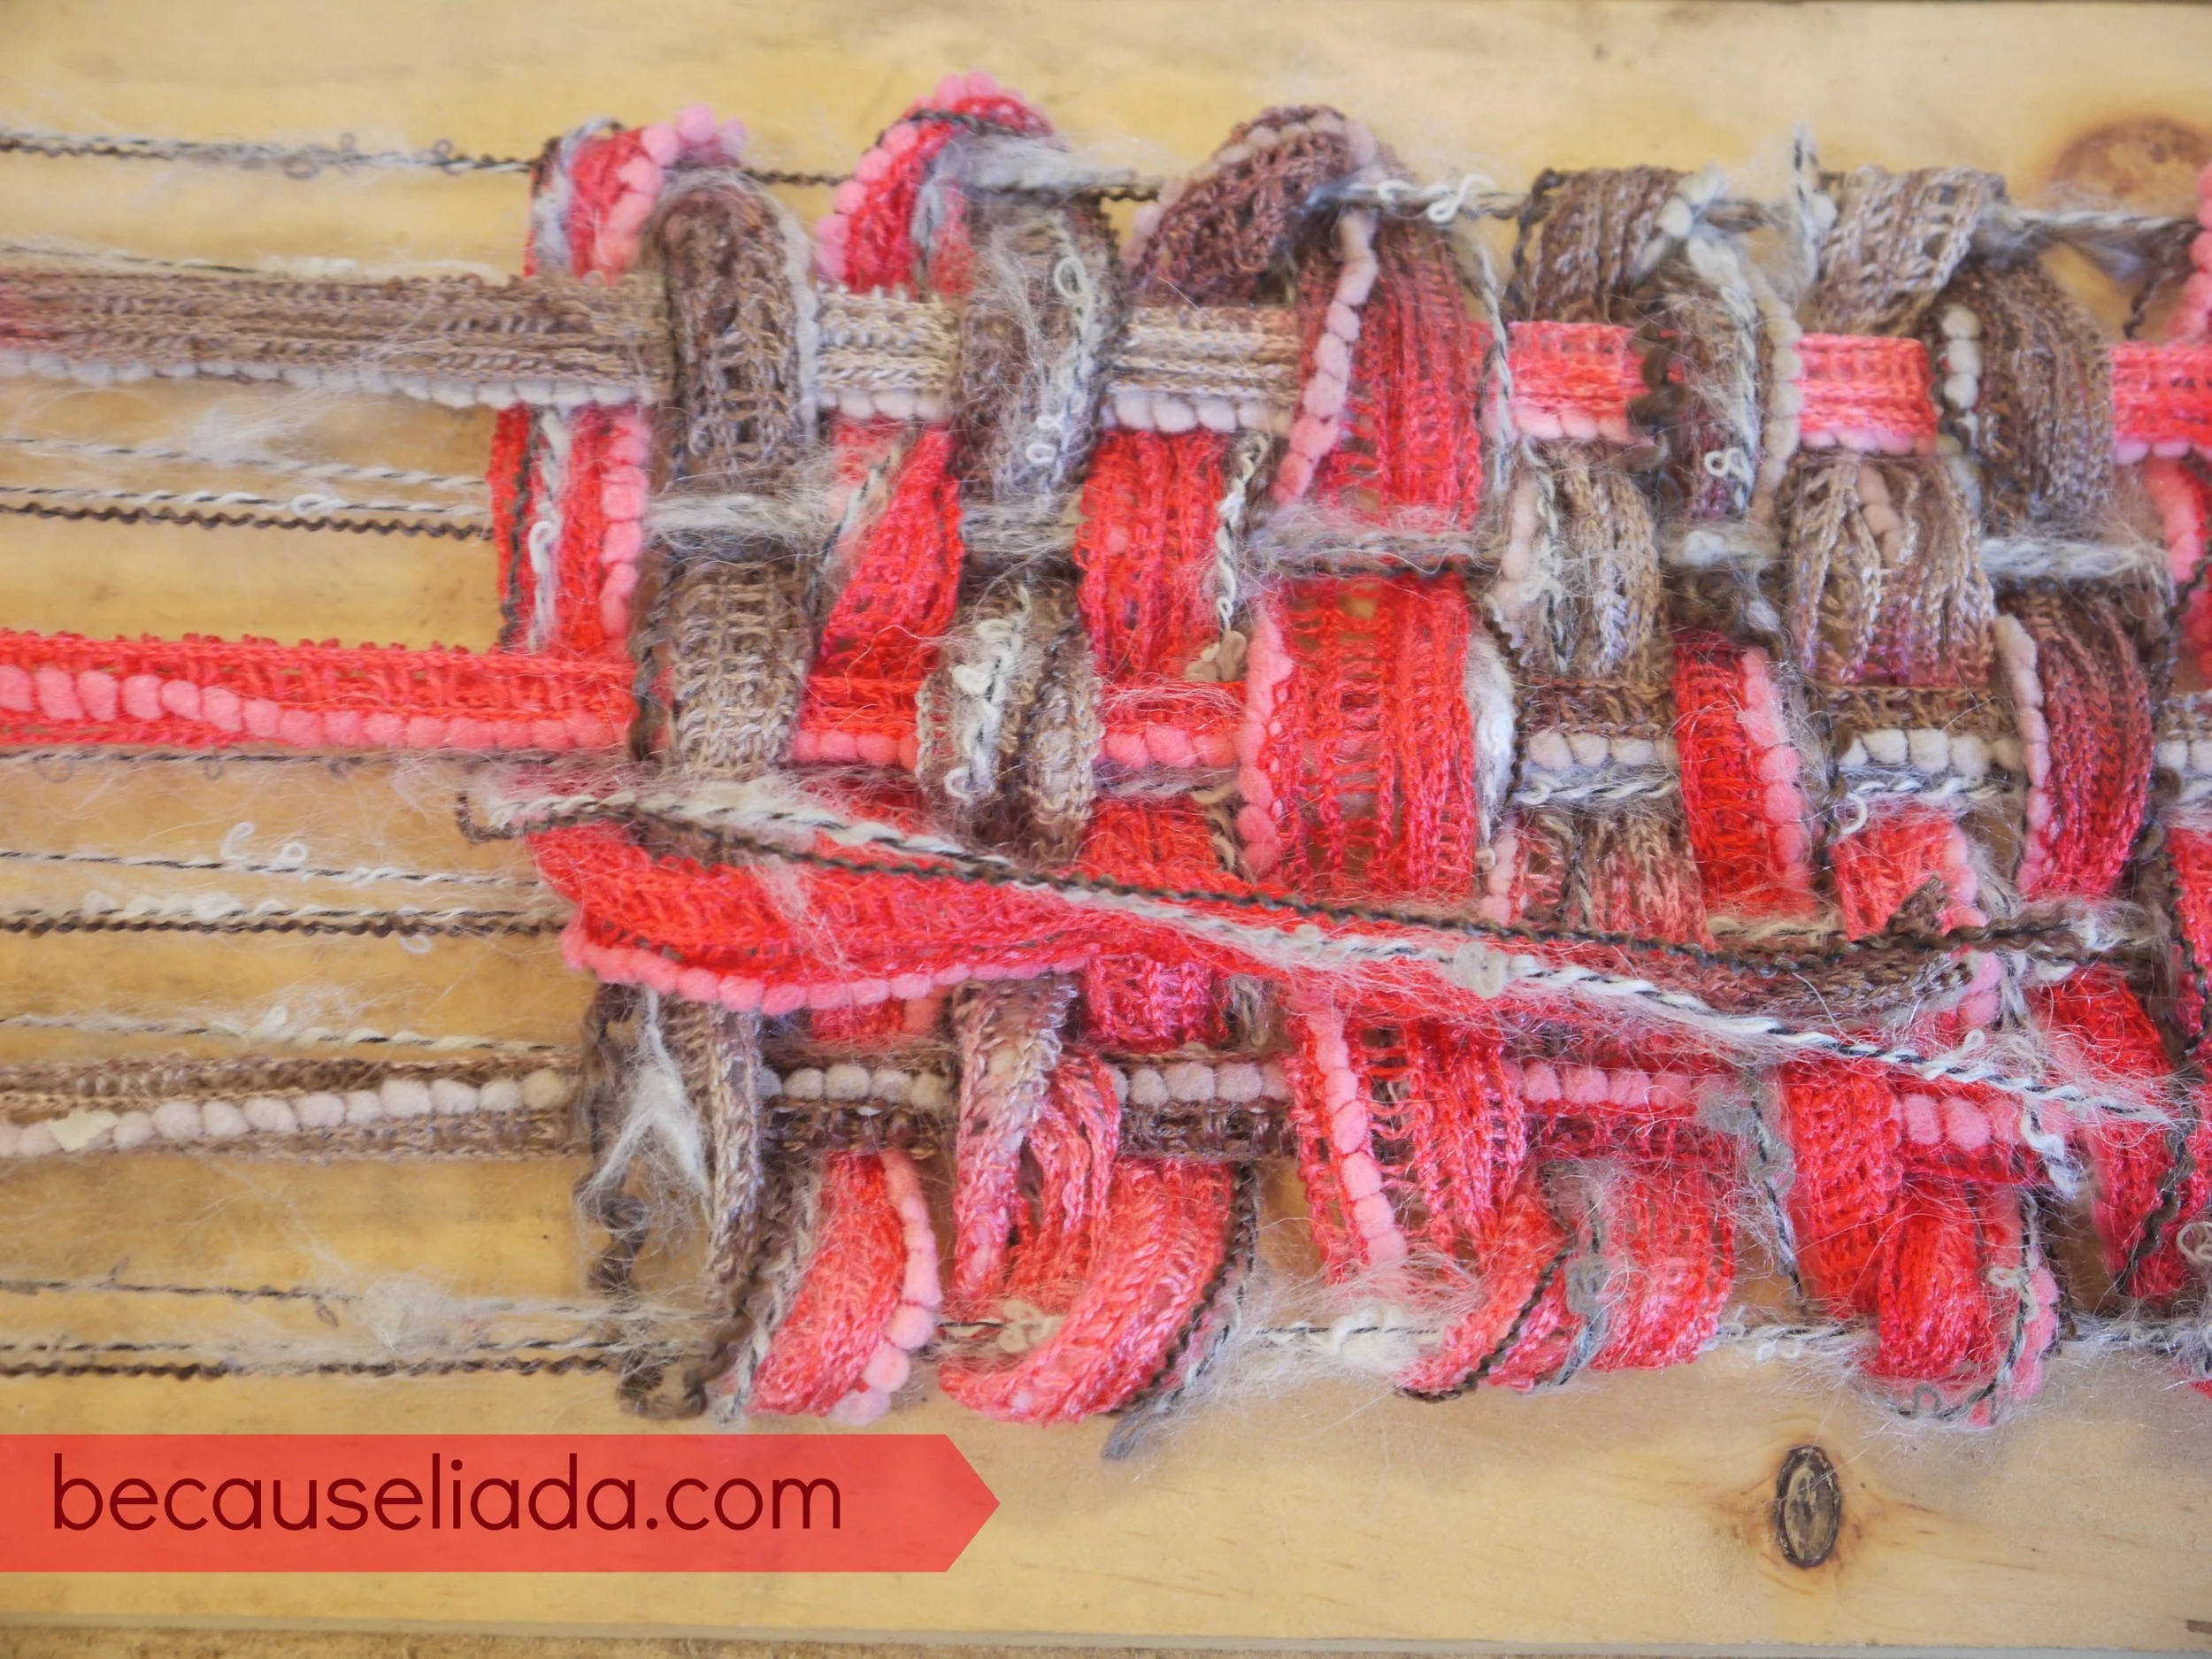
First we cut all the carpet pieces we had in half. We then cut fabric pieces for each piece of rubber backed carpet. You'll need to cut your fabric just a bit larger than your carpet piece on each side. I didn't measure but I'd say it was about an inch or so on each side. If you decide to use this technique to make your own, you may need to center the fabric, it will depend on the overall print you choose. If possible, I would suggest choosing a fabric where centering the design will not matter. It will just be easier all around and will probably save you money as you won't have to figure on getting the repeat in the pattern right when you measure for fabric. I chose to center my fabric left to right but not front to back.

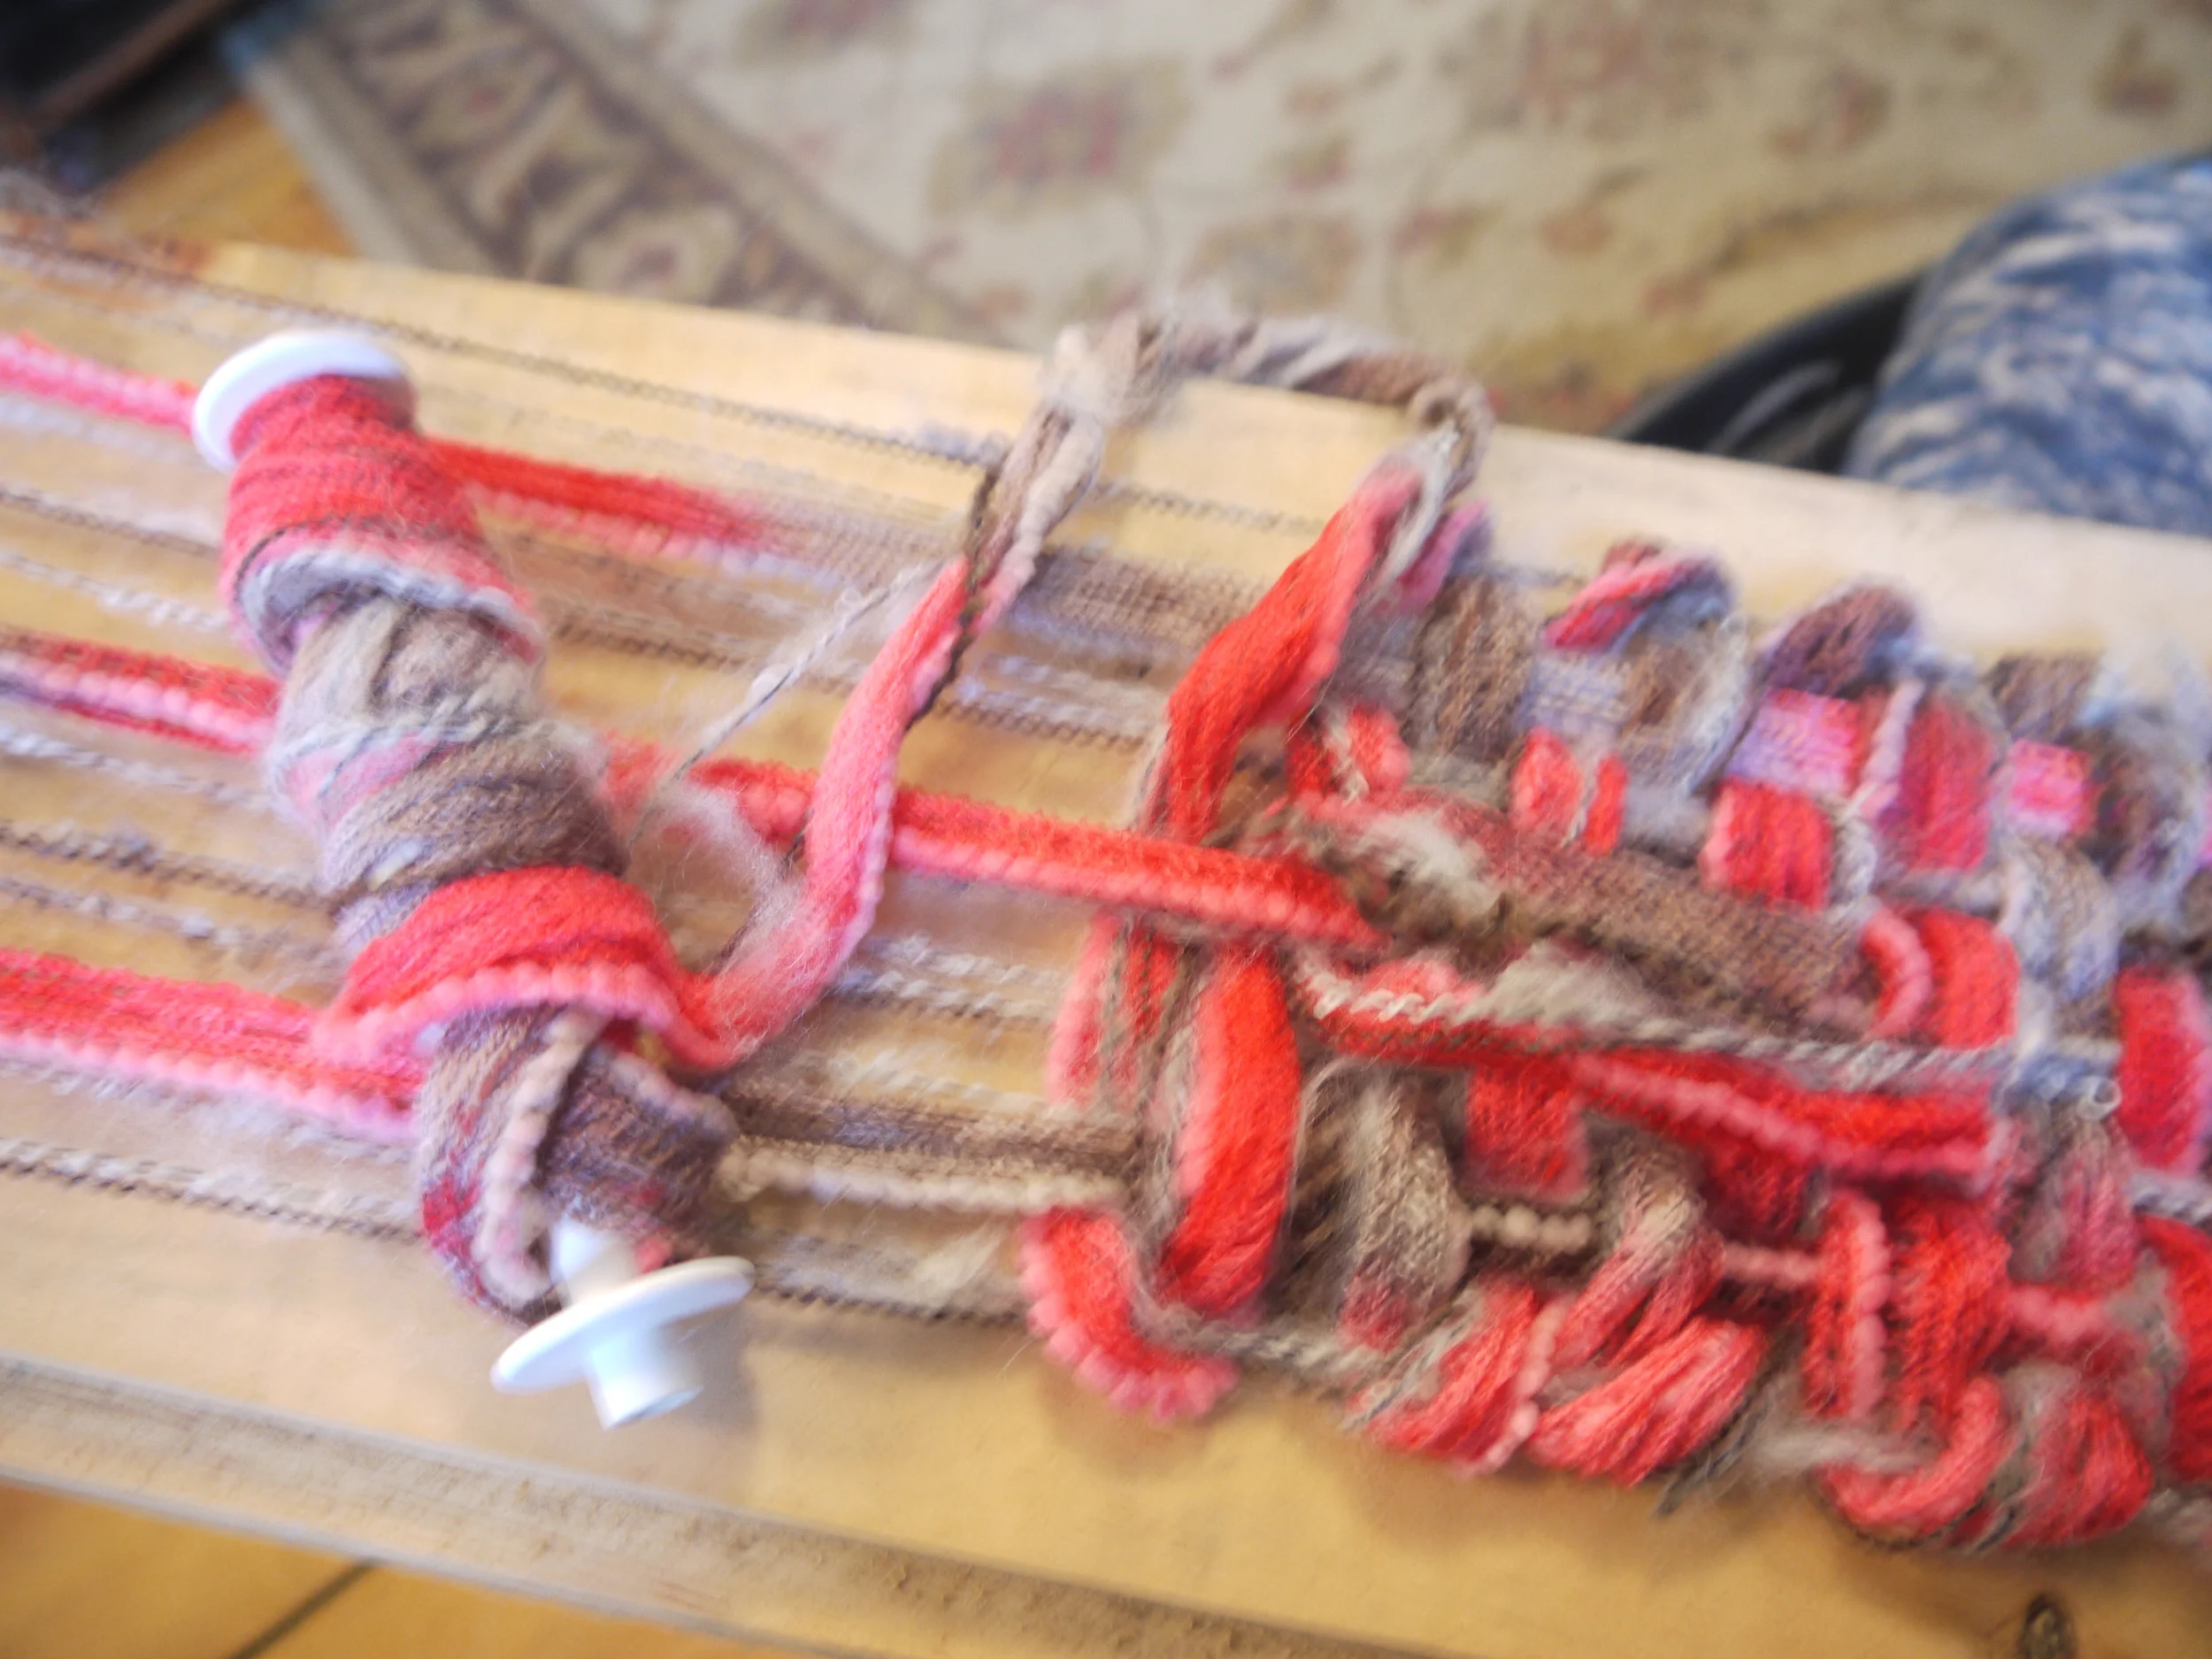
We spread glue all over the top (the carpeted side) of the carpet pieces

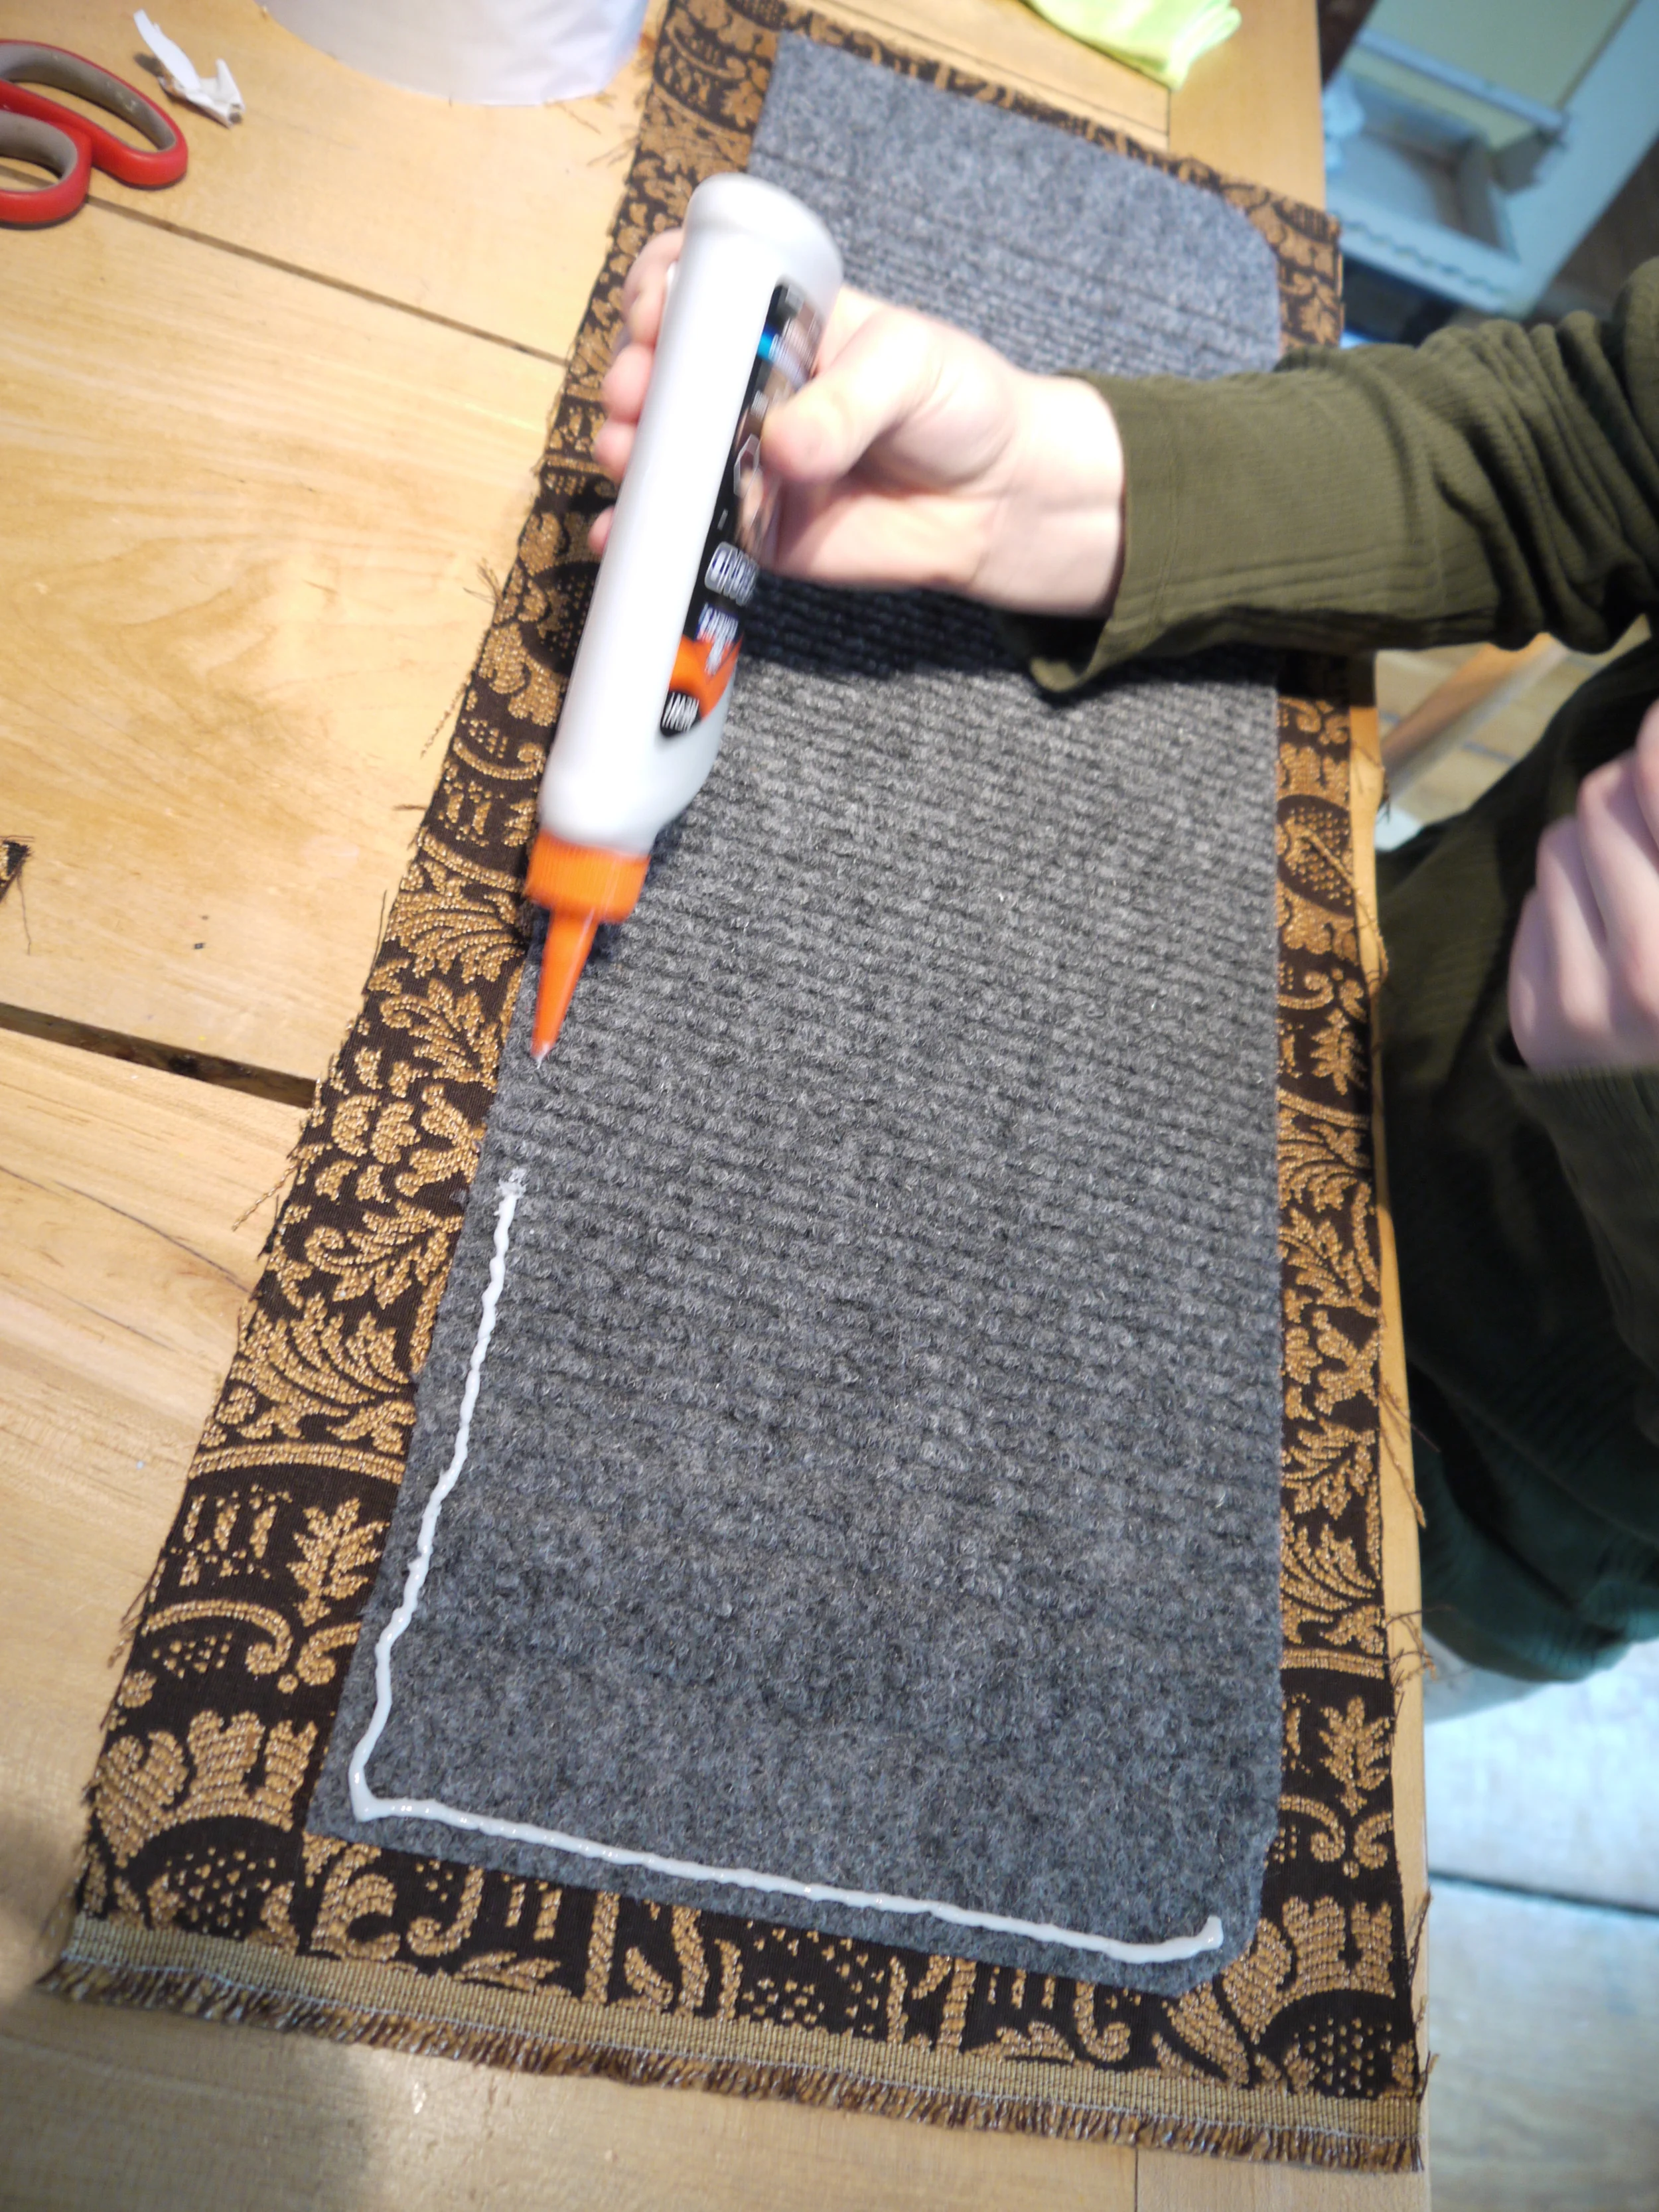
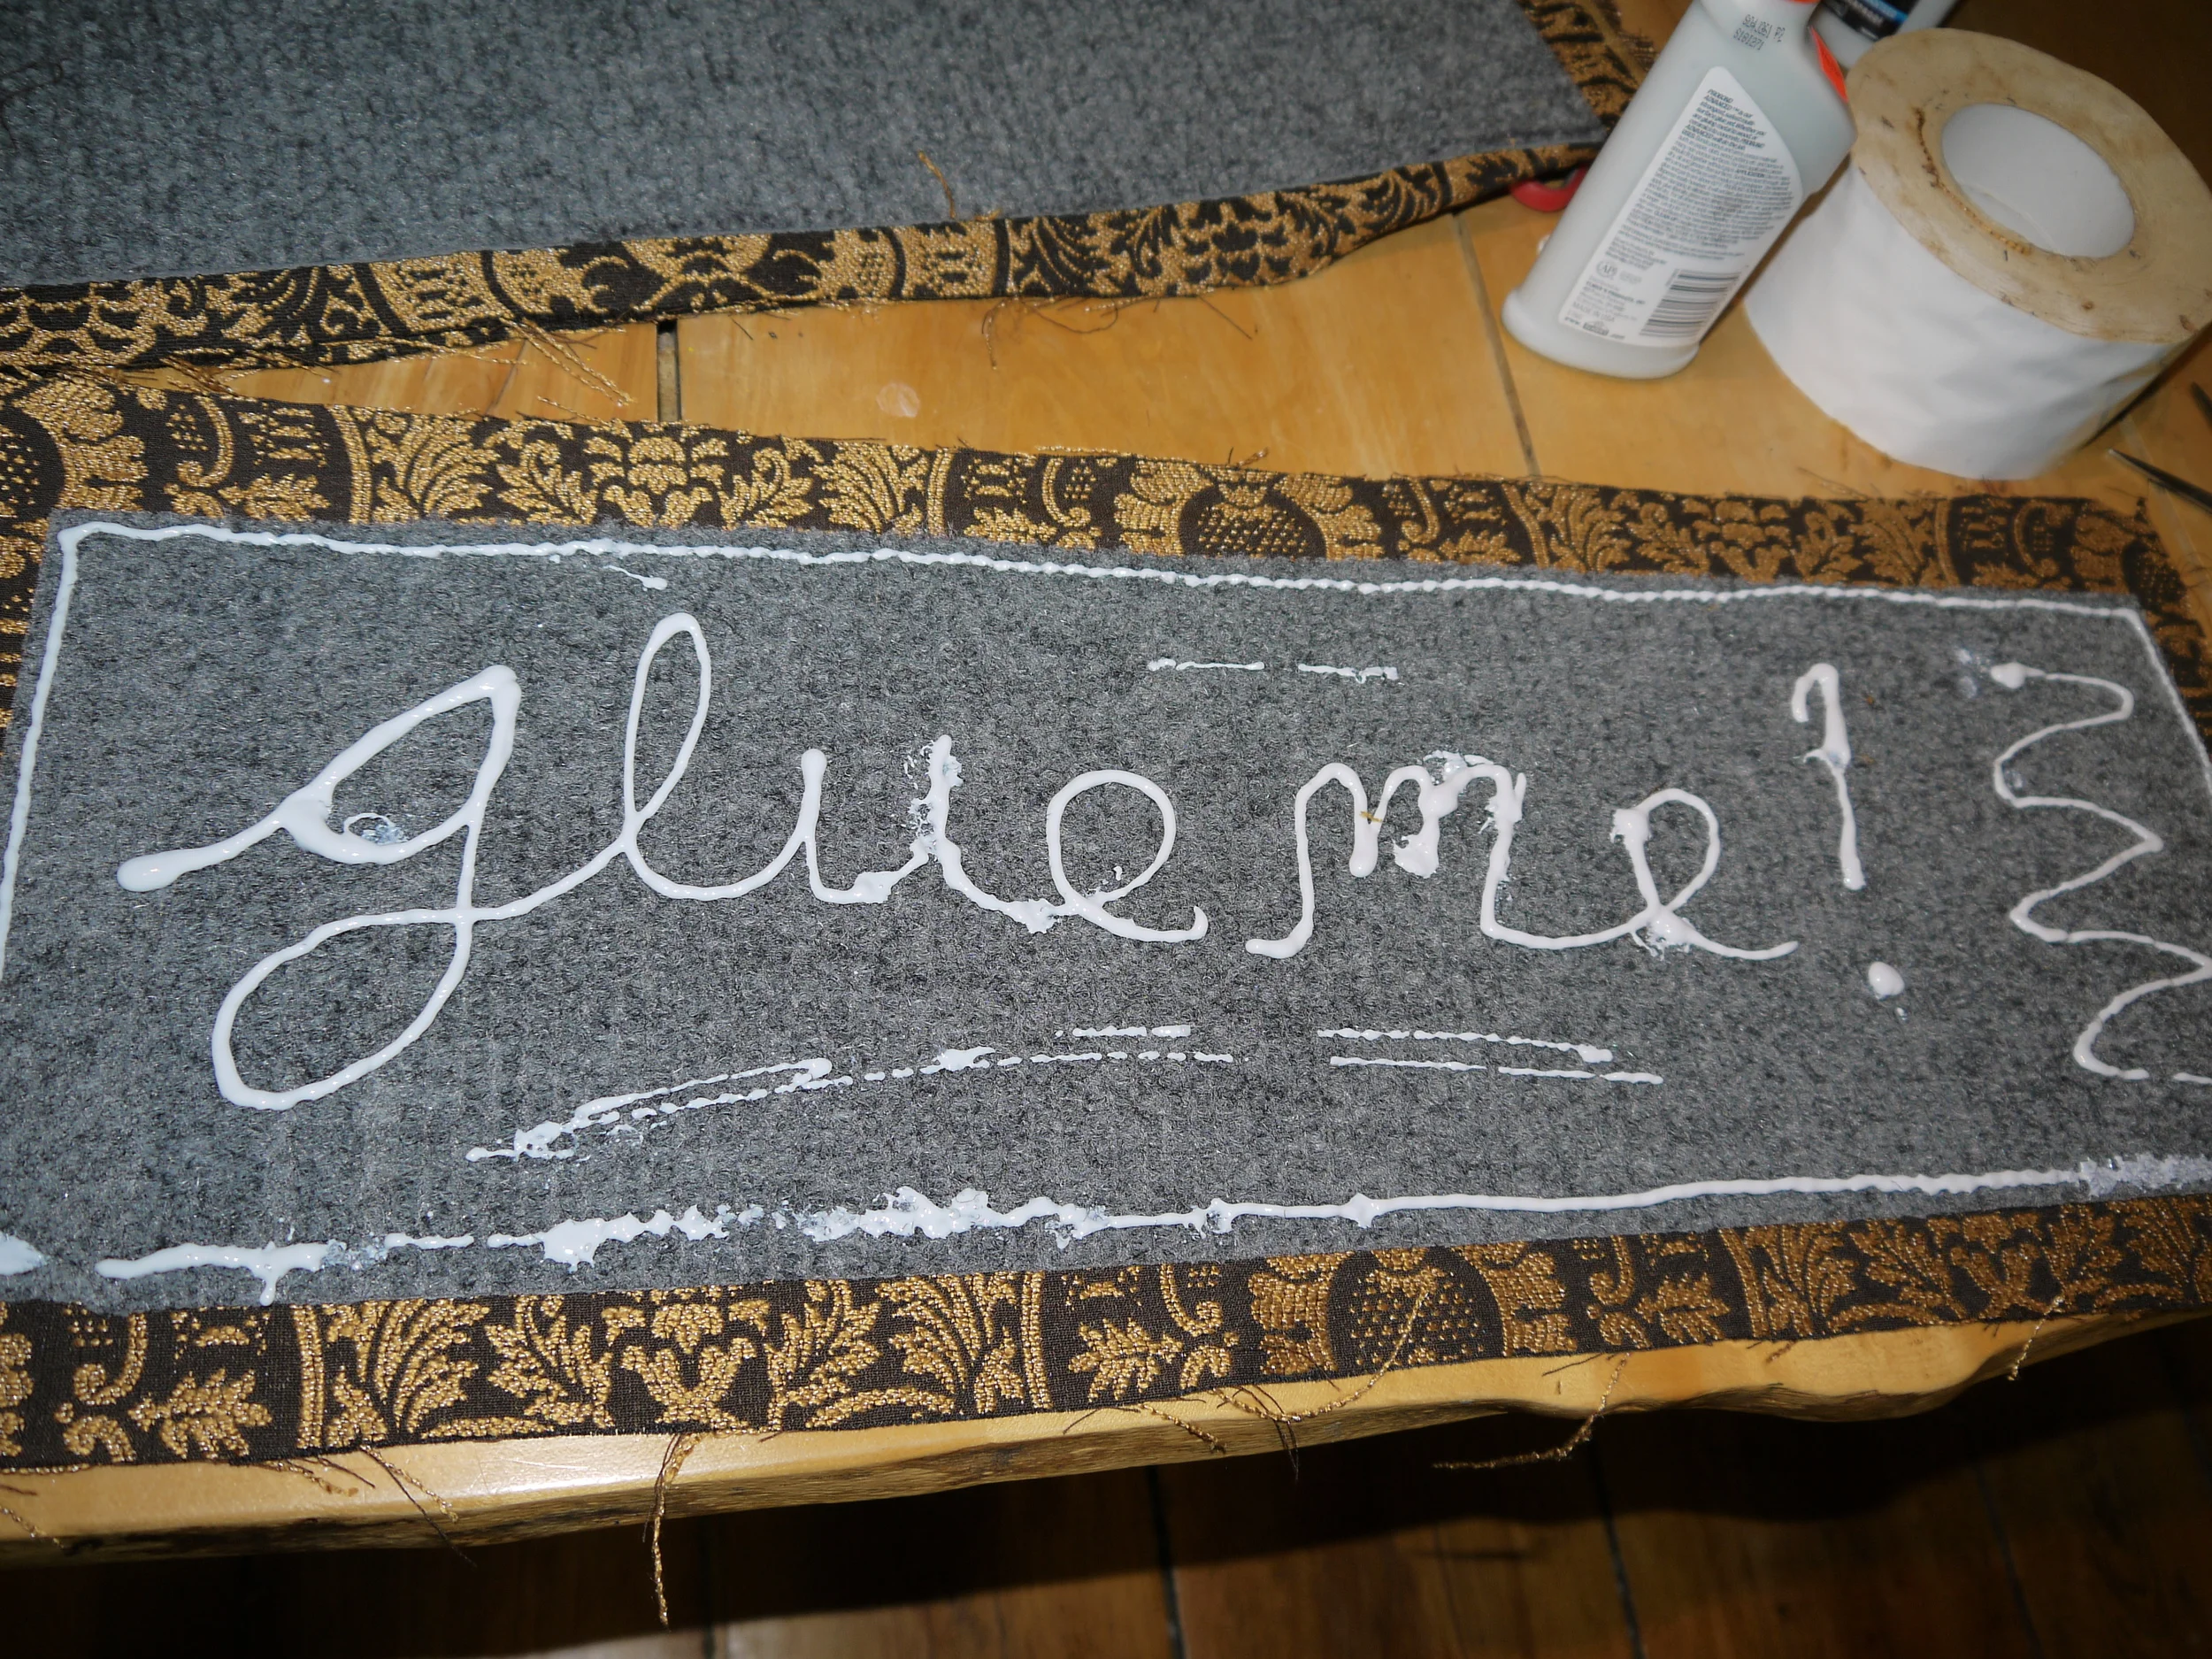
We spread out the glue.

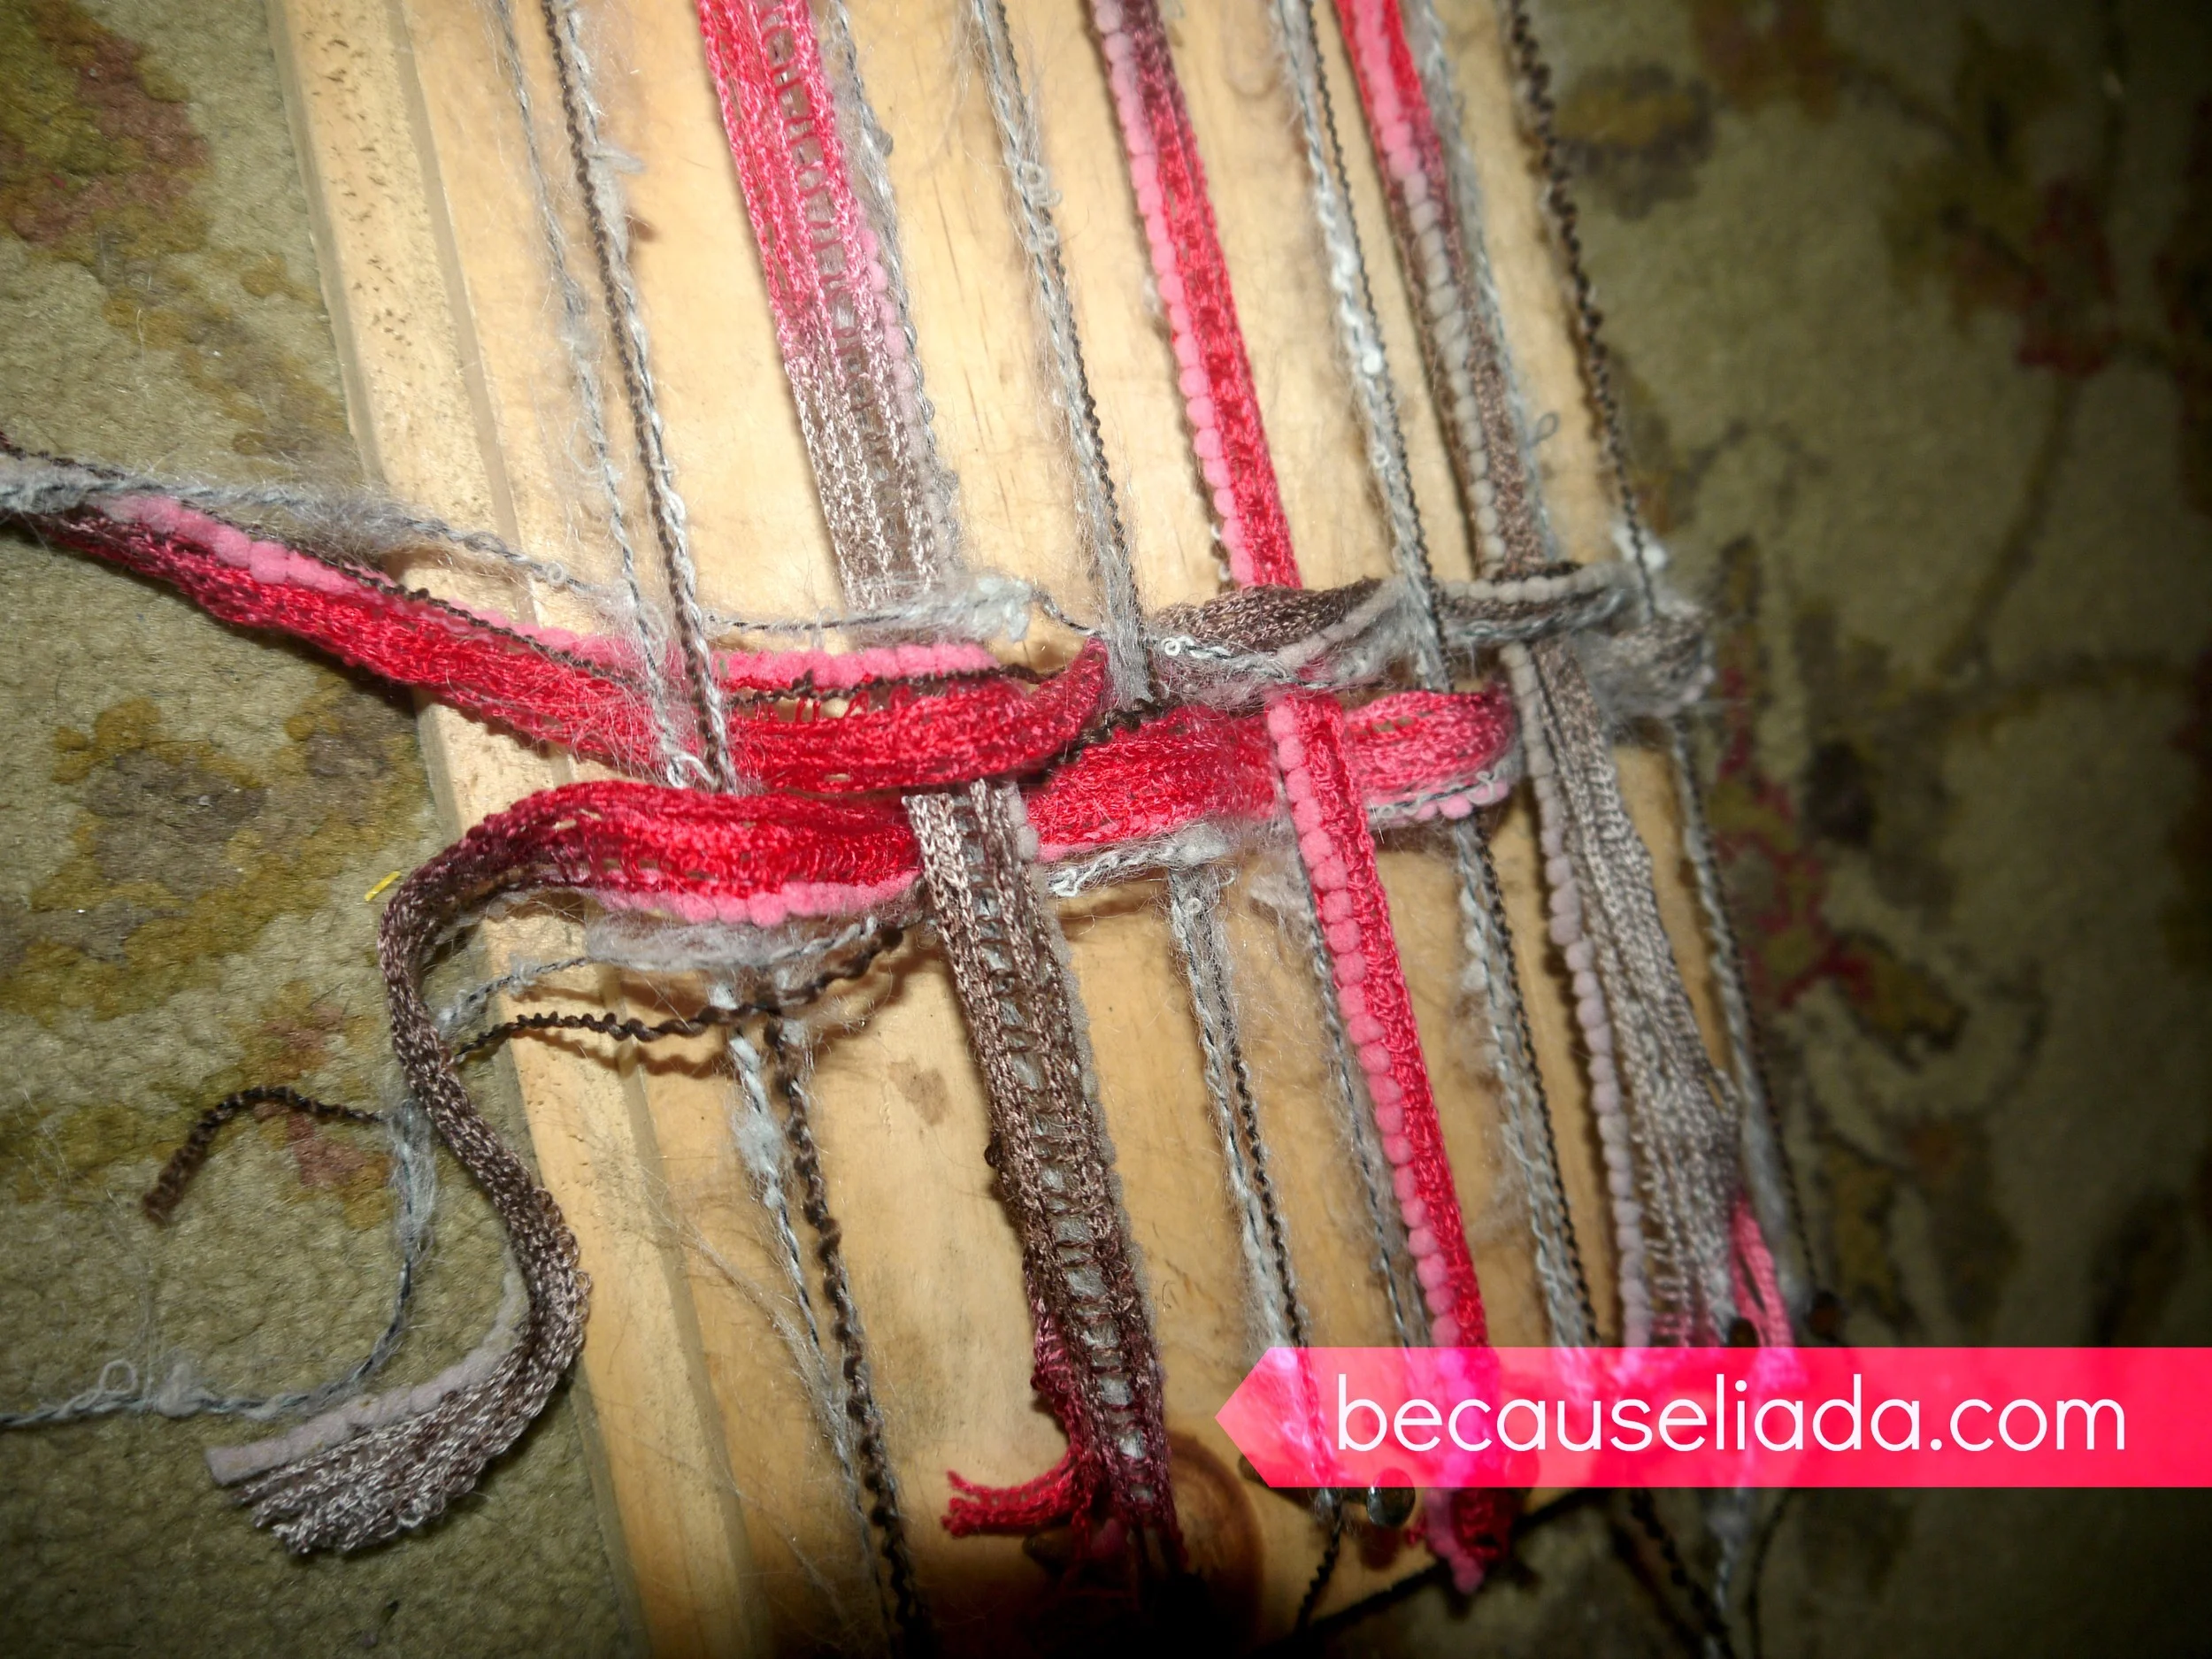
We then flipped the carpet over so the glue side was down on the backside of the fabric. Then we cut a piece of tape the length of the long side of the carpet square. Unrolling the tape proved to be the most challenging aspect of this entire project. The tape was so sticky it took tons of strength just to unroll it. 

We then gently lifted up the fabric and placed it down on the tape so the tape was just about but not quite up to the edge of the carpet piece. After we pressed on the fabric a bit to make sure it was sticking to the tape (like there was any doubt of that!), we folded it over the back side of the carpet square and pressed down to stick it. (I hope that makes sense...see the picture)

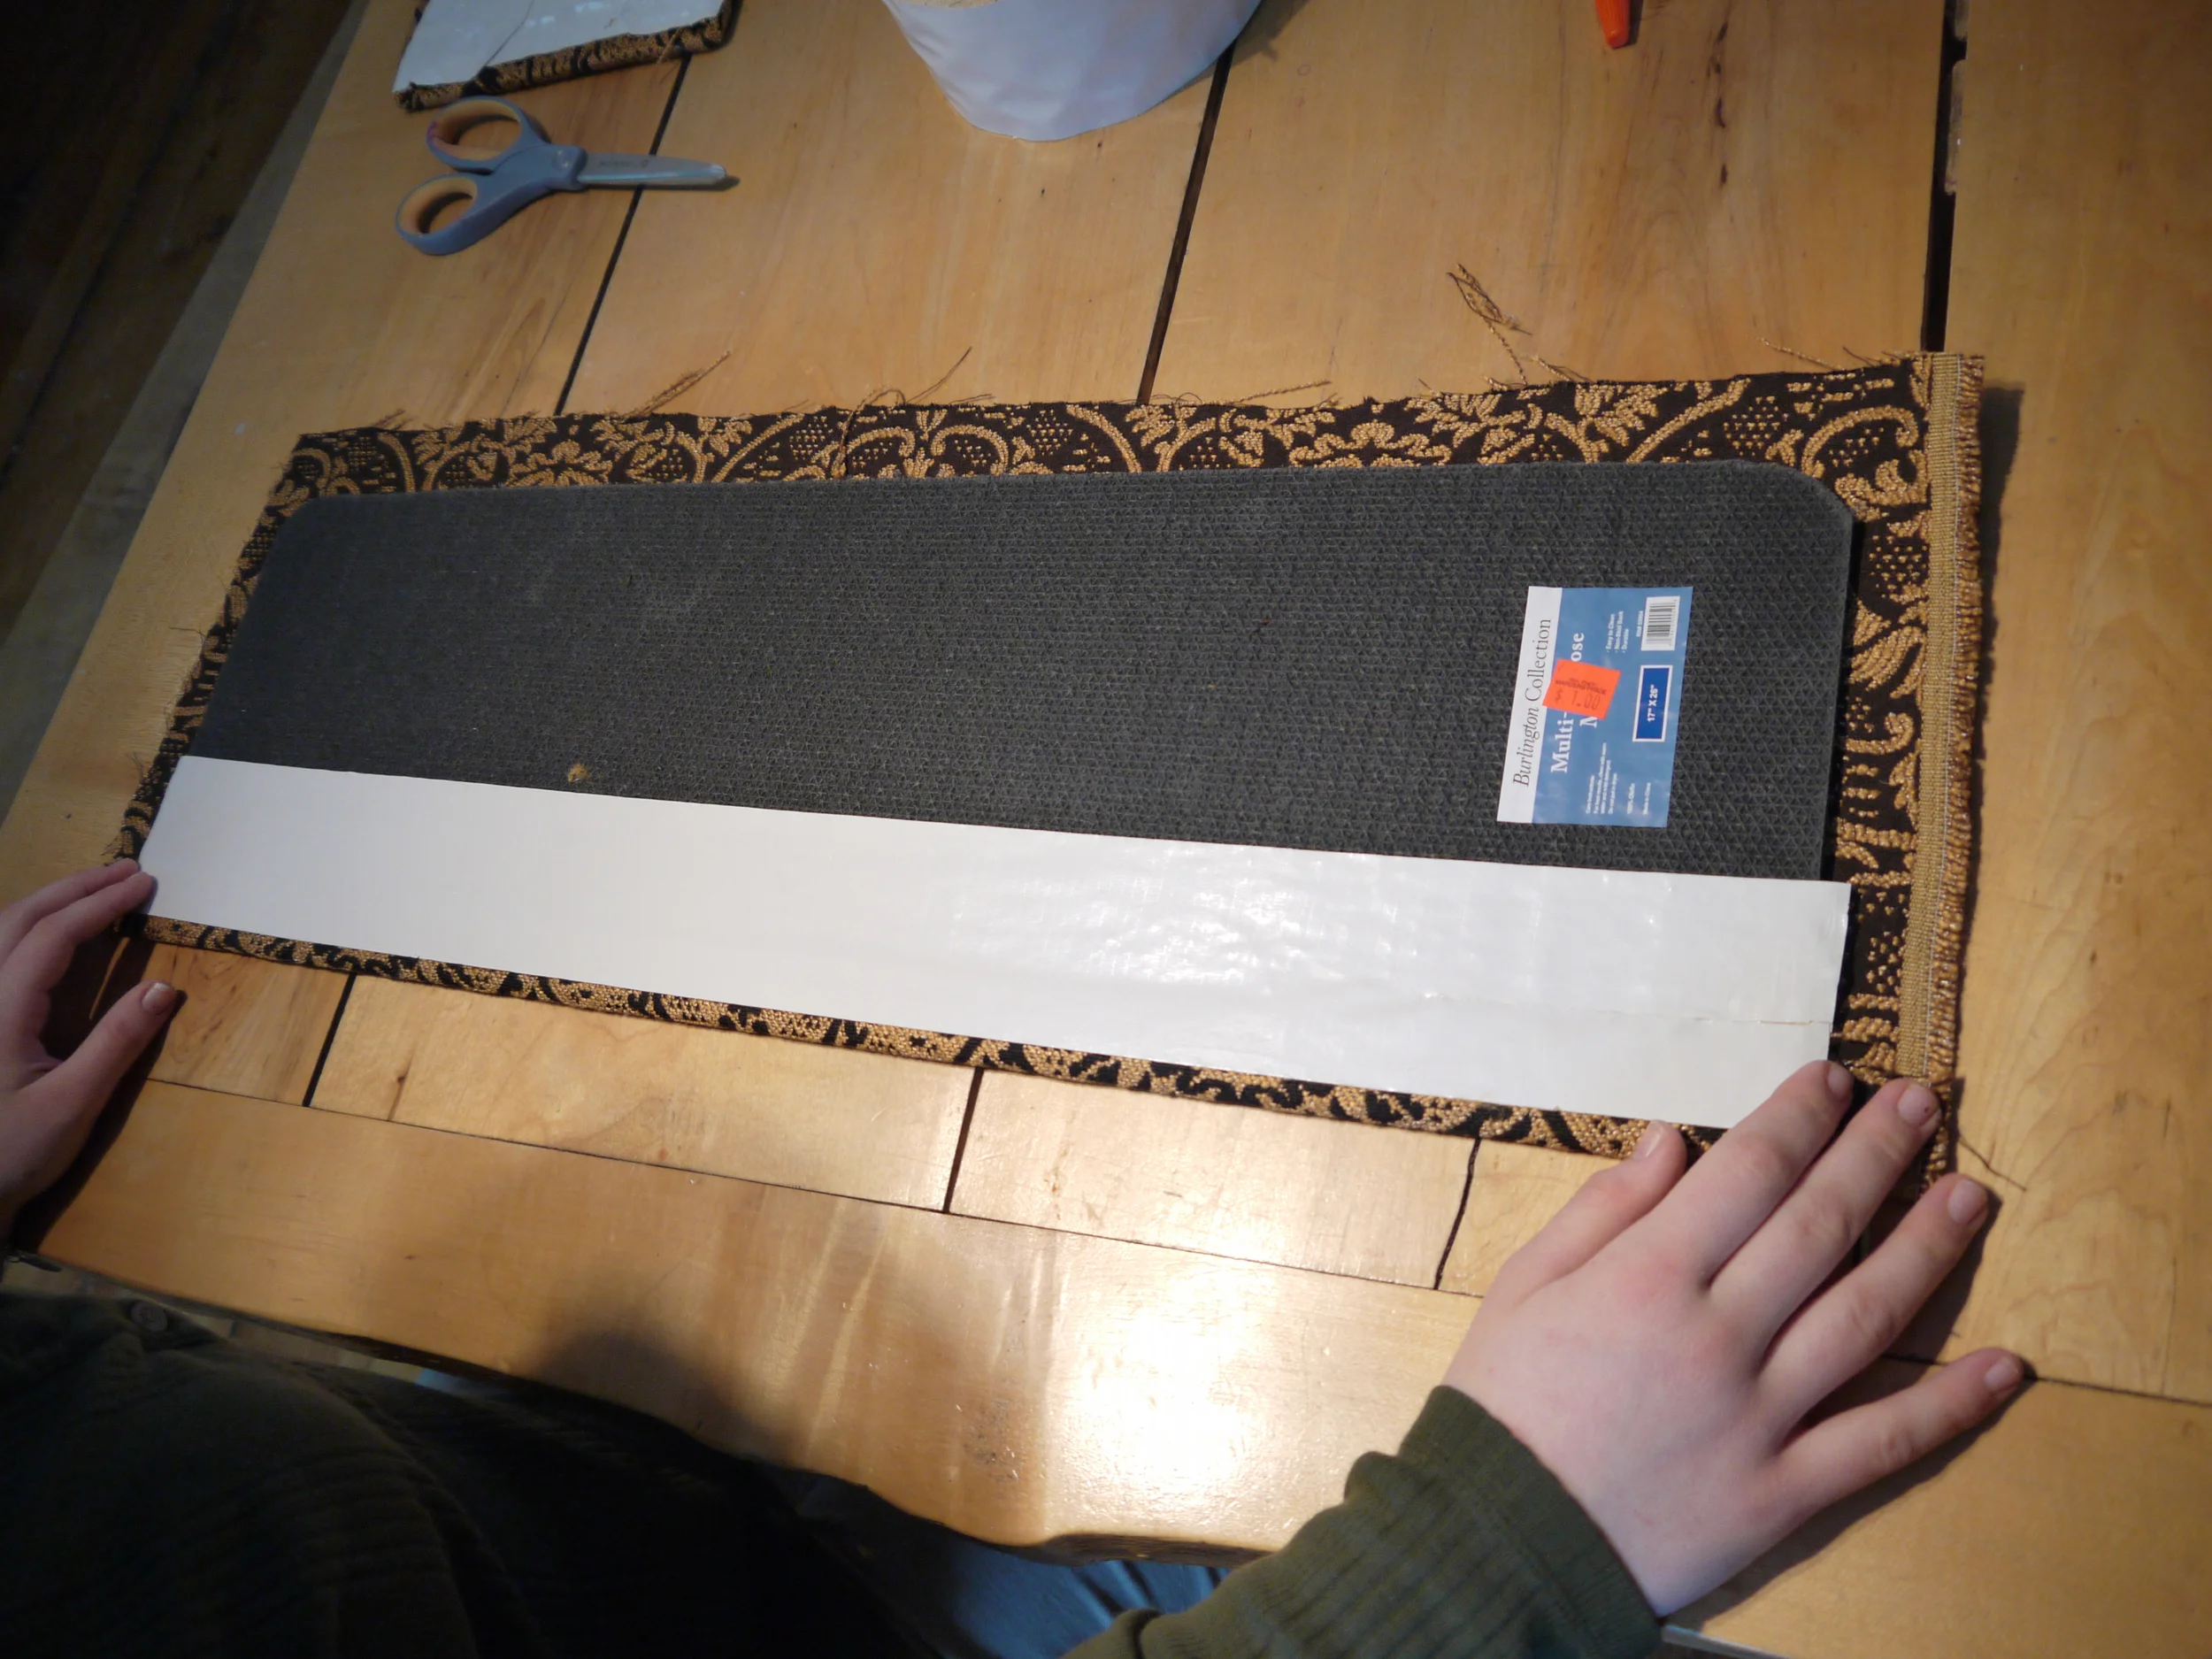
We did the same on each side. Oh, I almost forgot, we did run a bead of glue down the edge of each side right before folding the fabric and tape over the back. 

Stairway Makeover

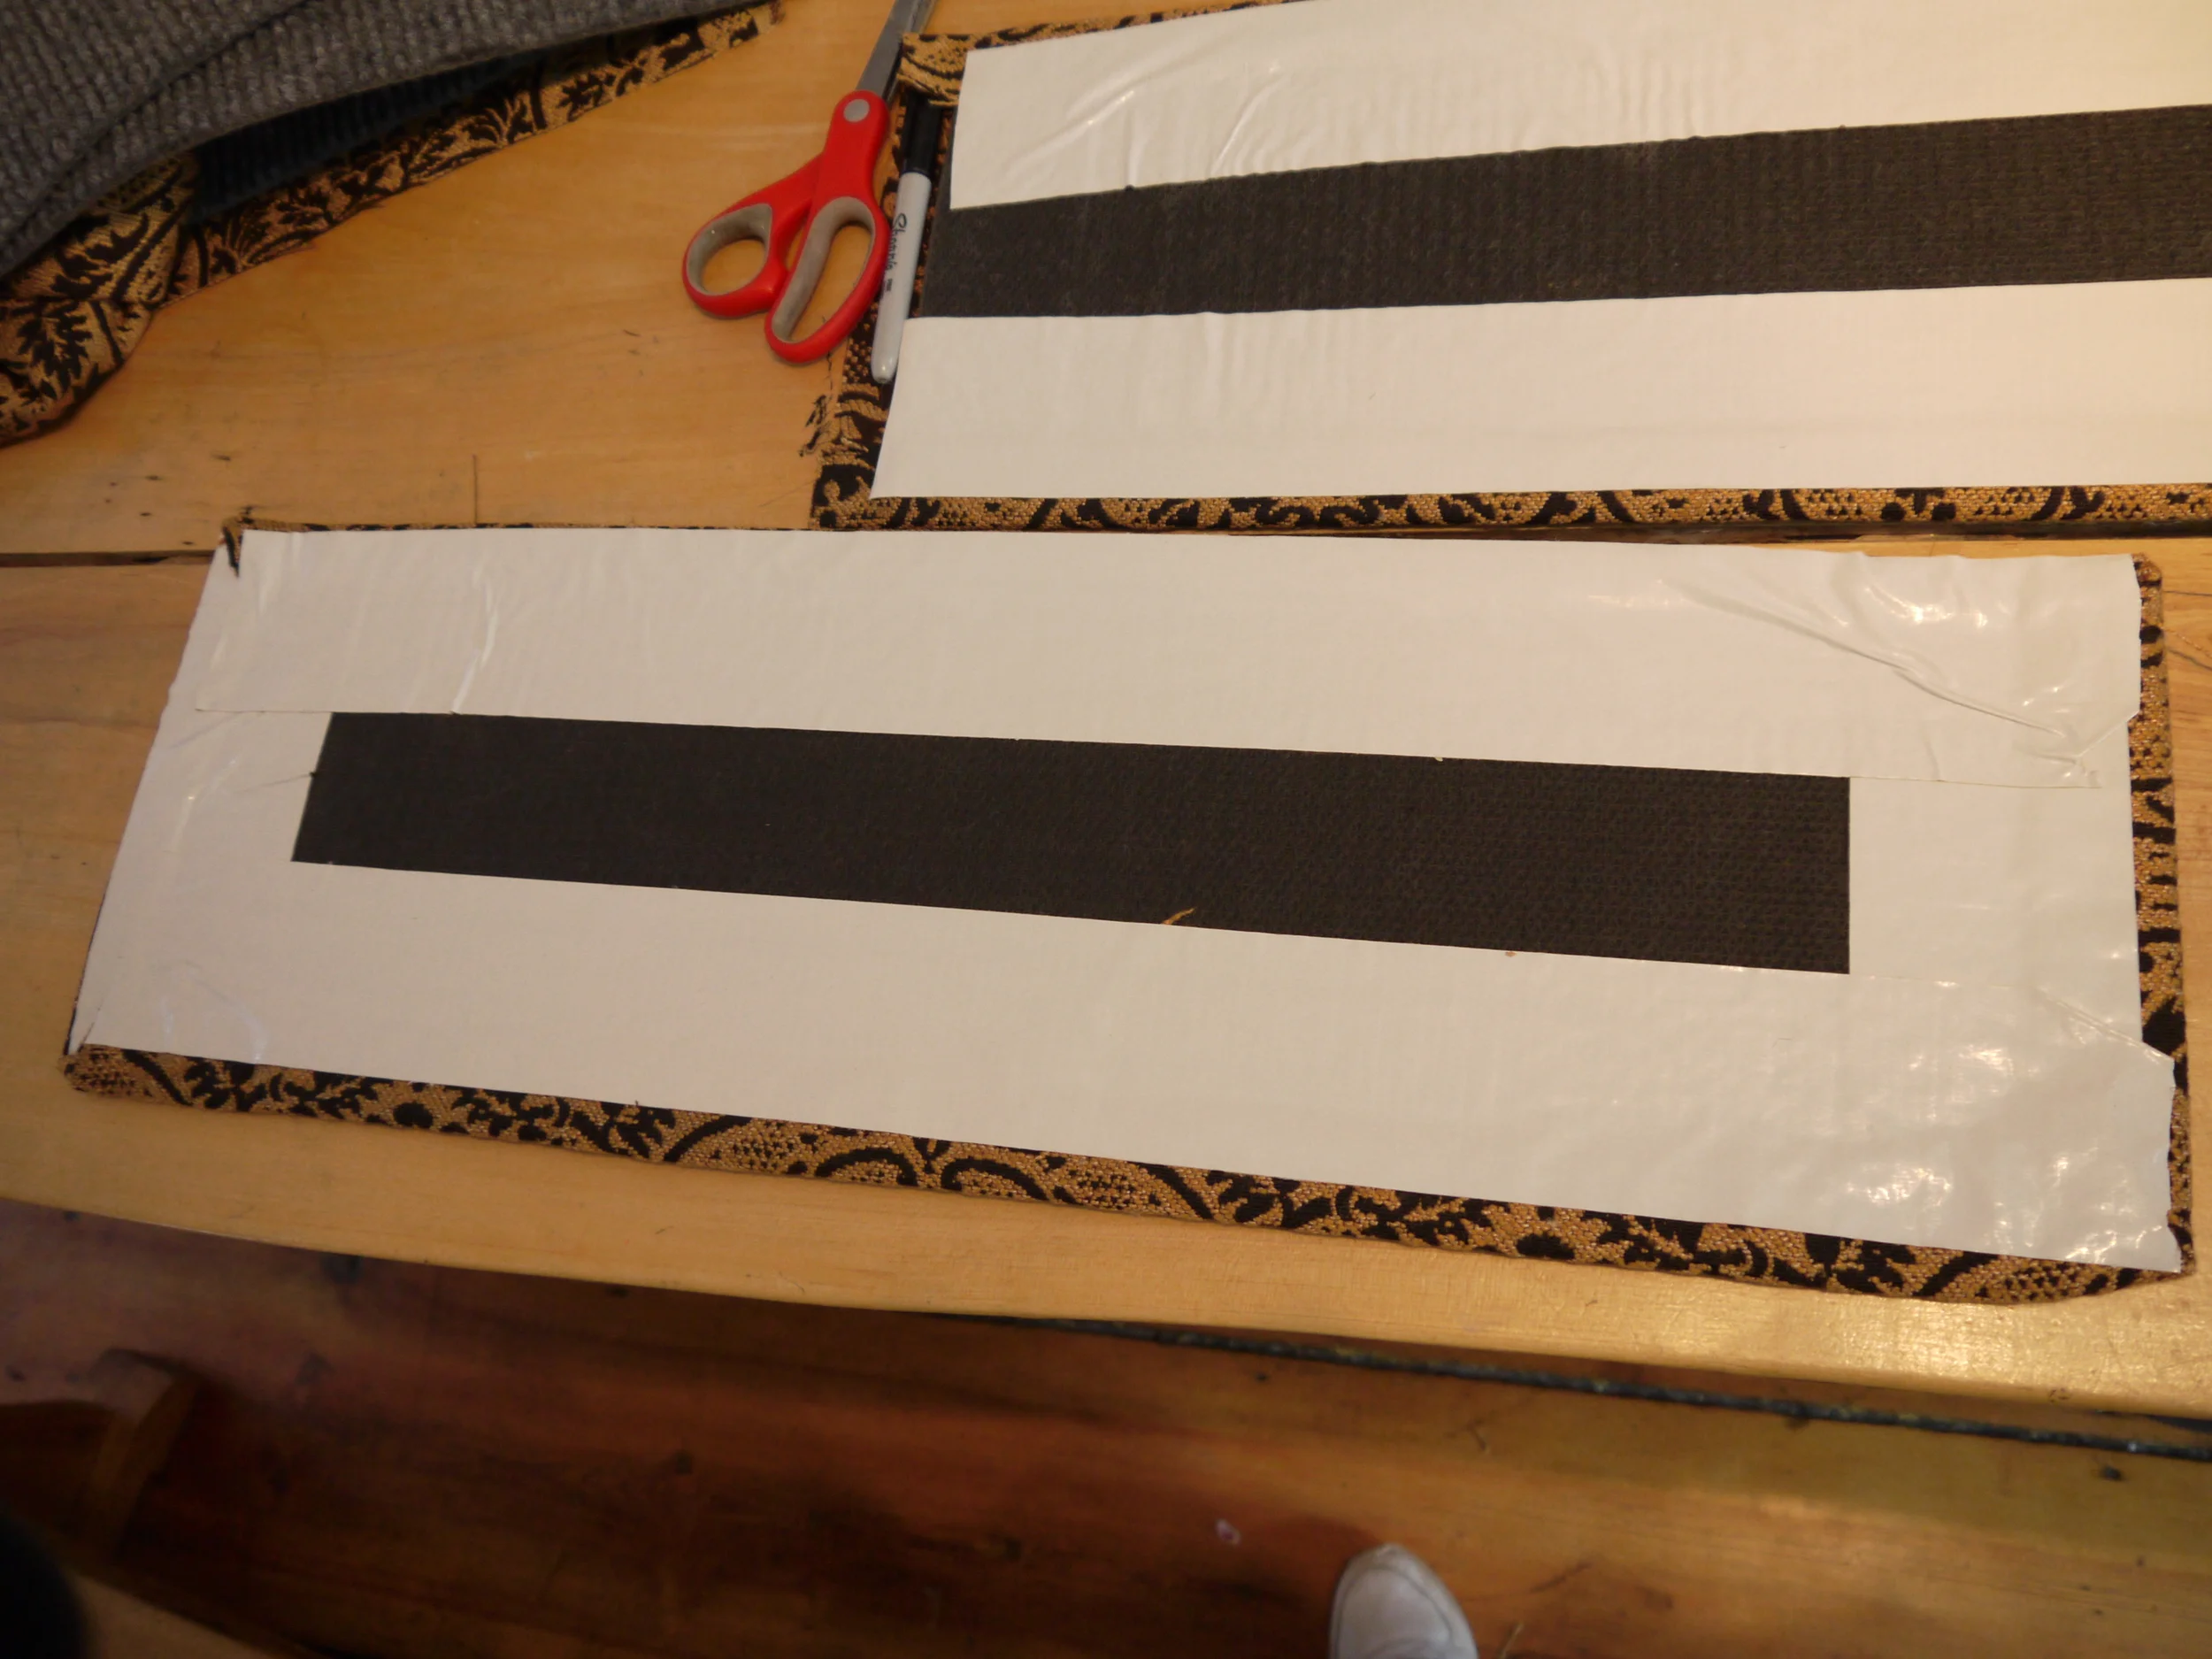
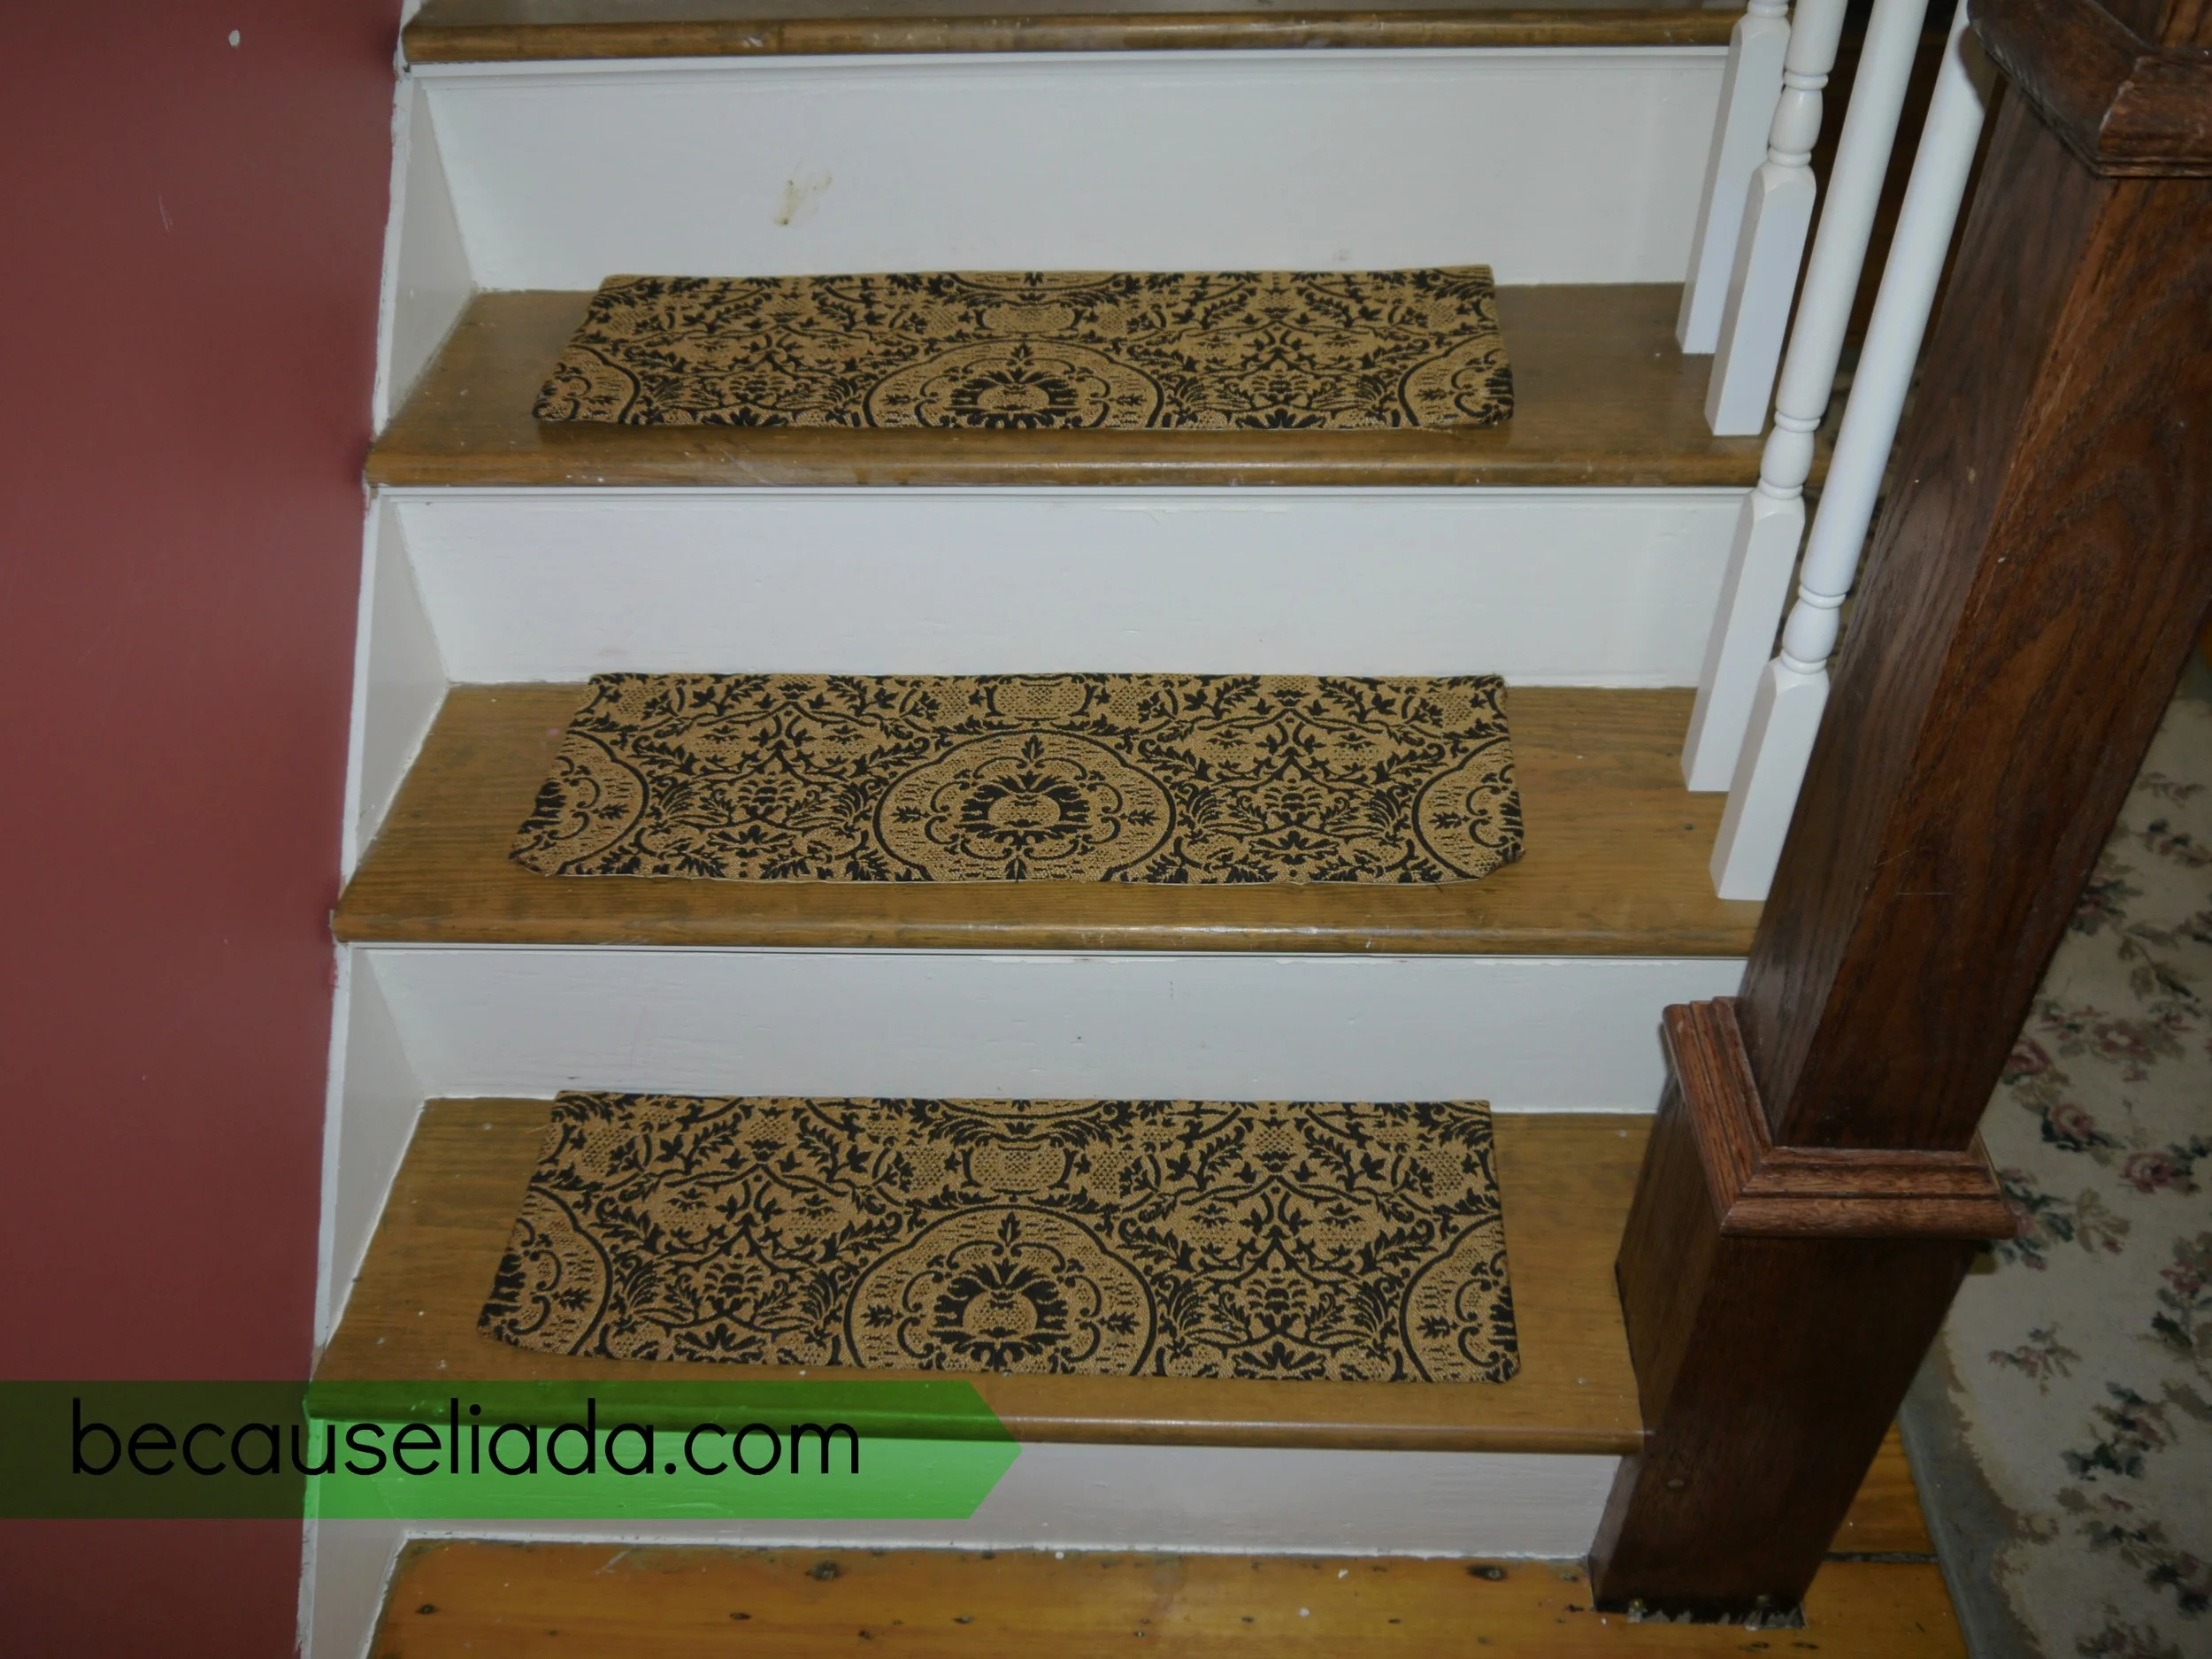
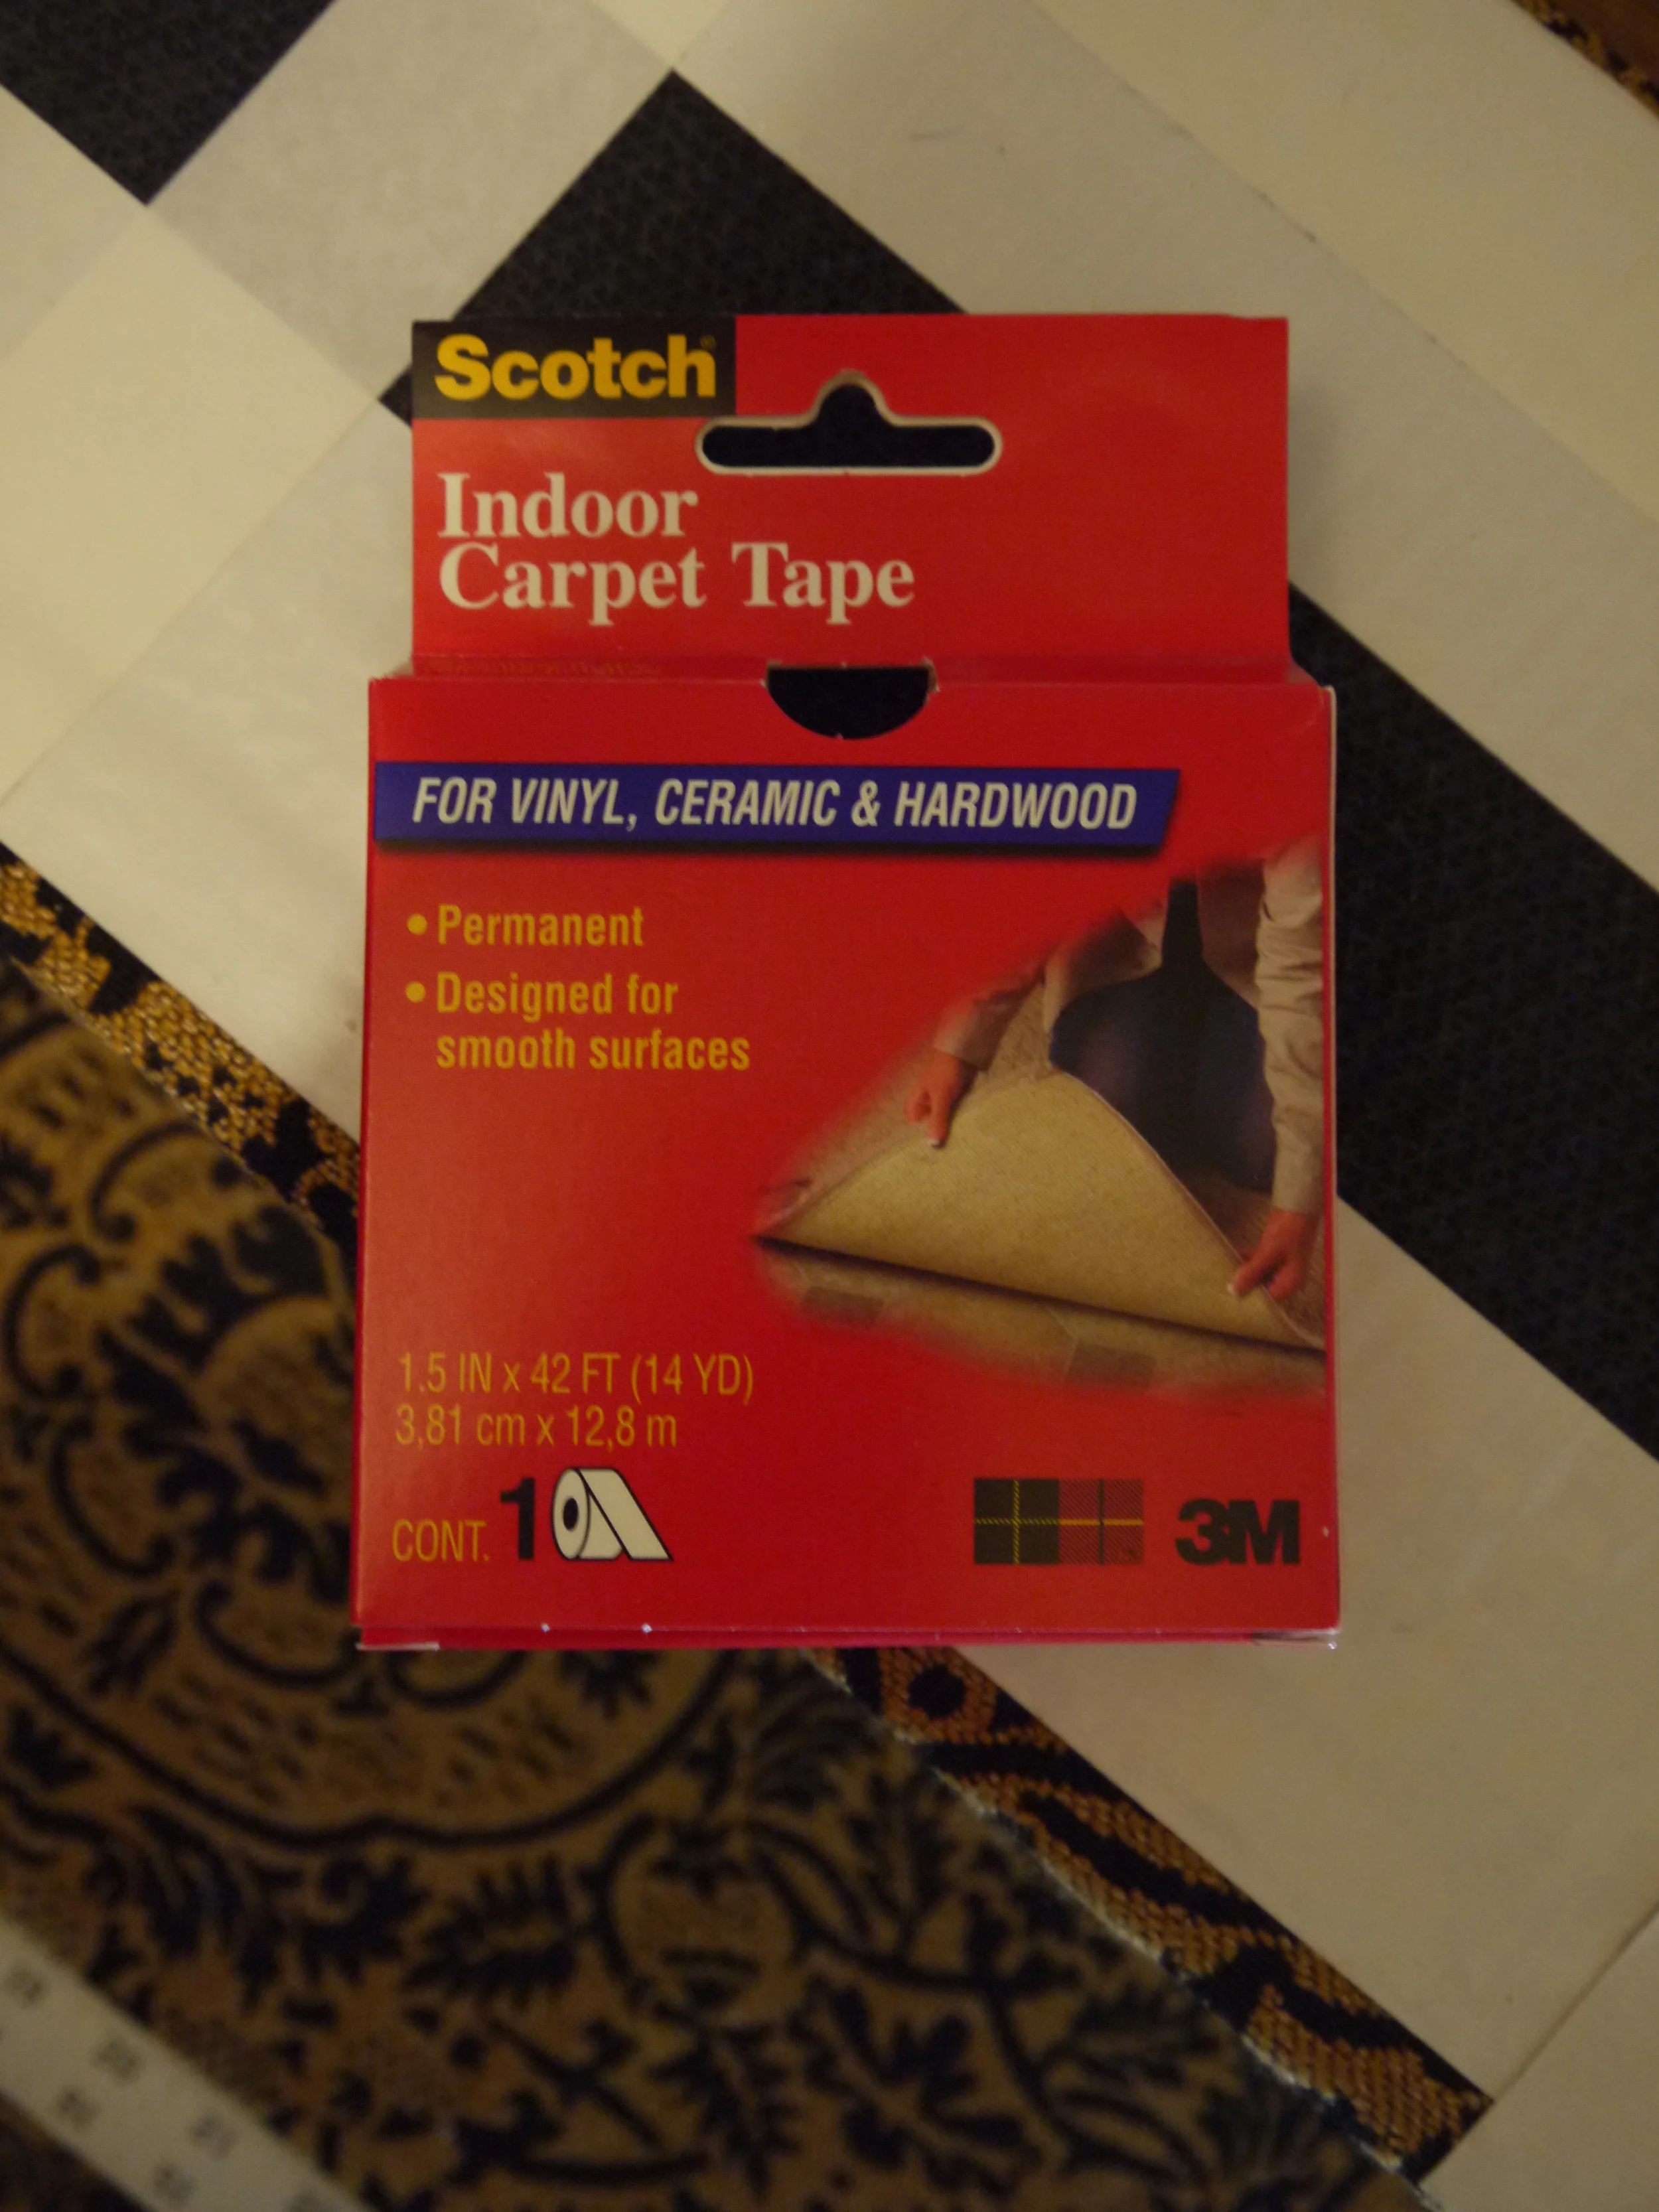
That's basically it. For each step repeat the same process. To attach these to the stair treads we used Scotch indoor carpet tape. We ran it down each short end, in the center and along the front edge. 

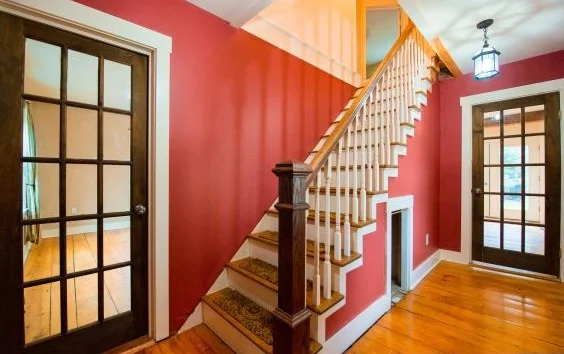
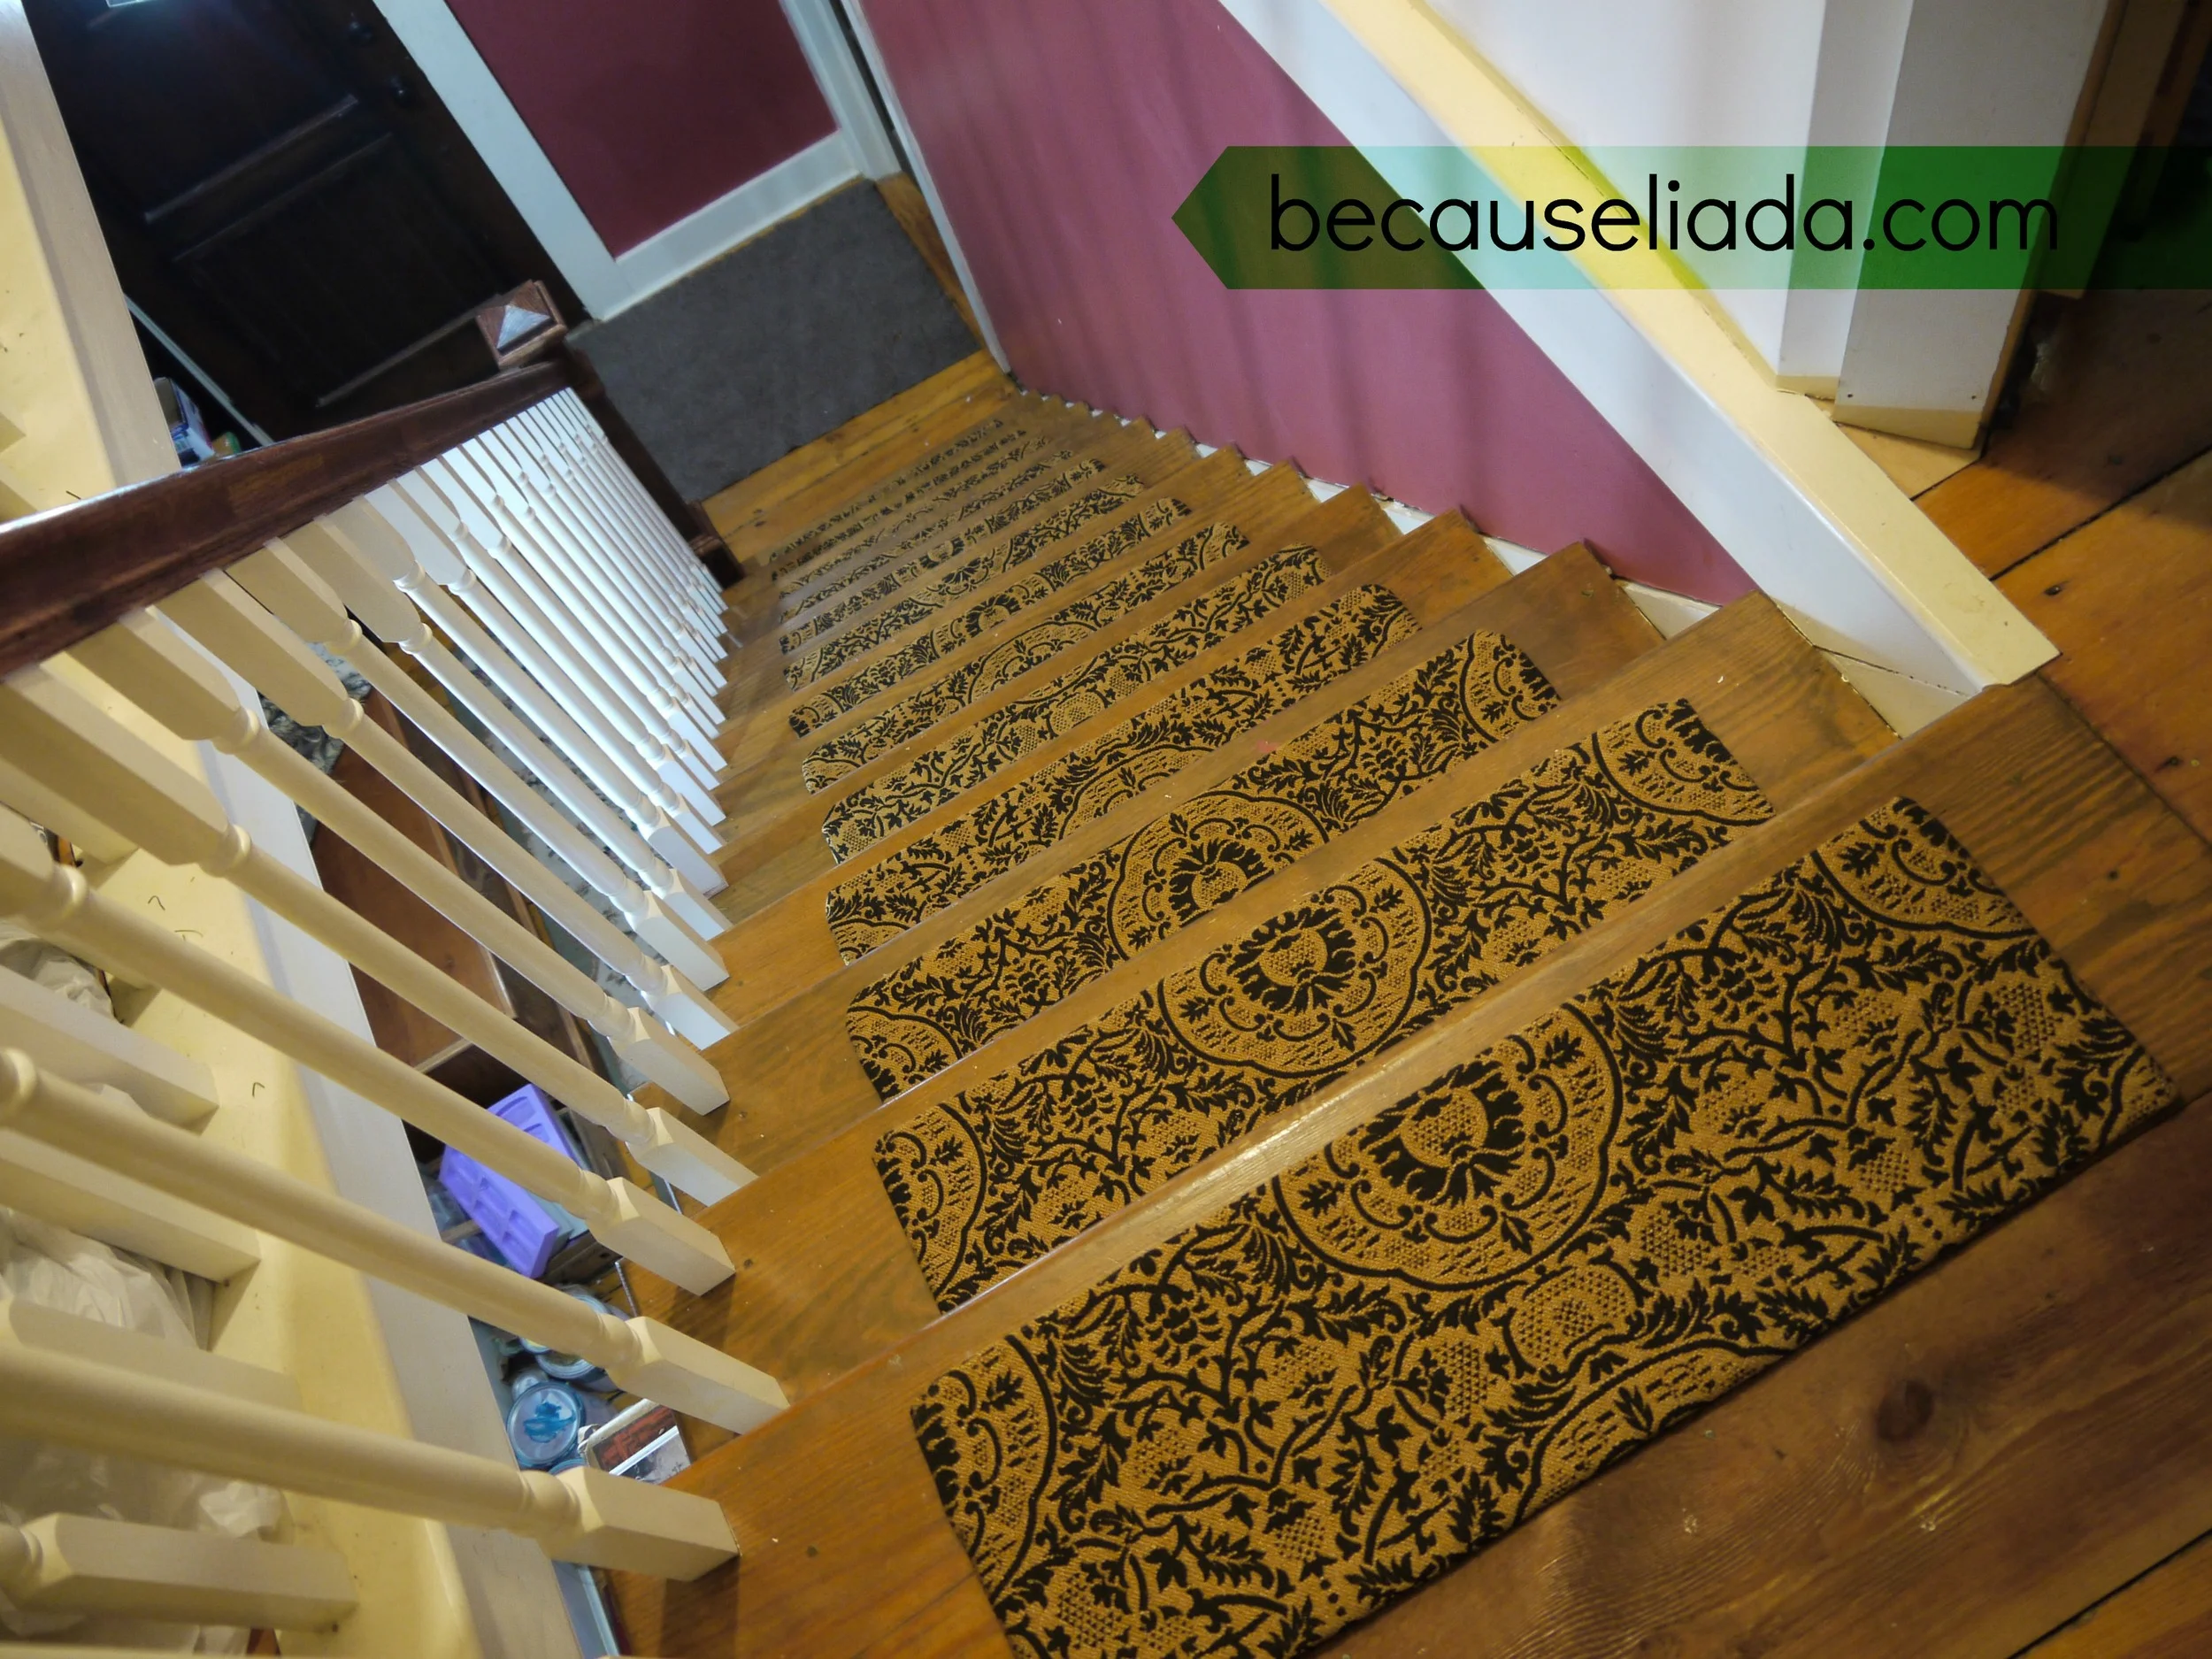
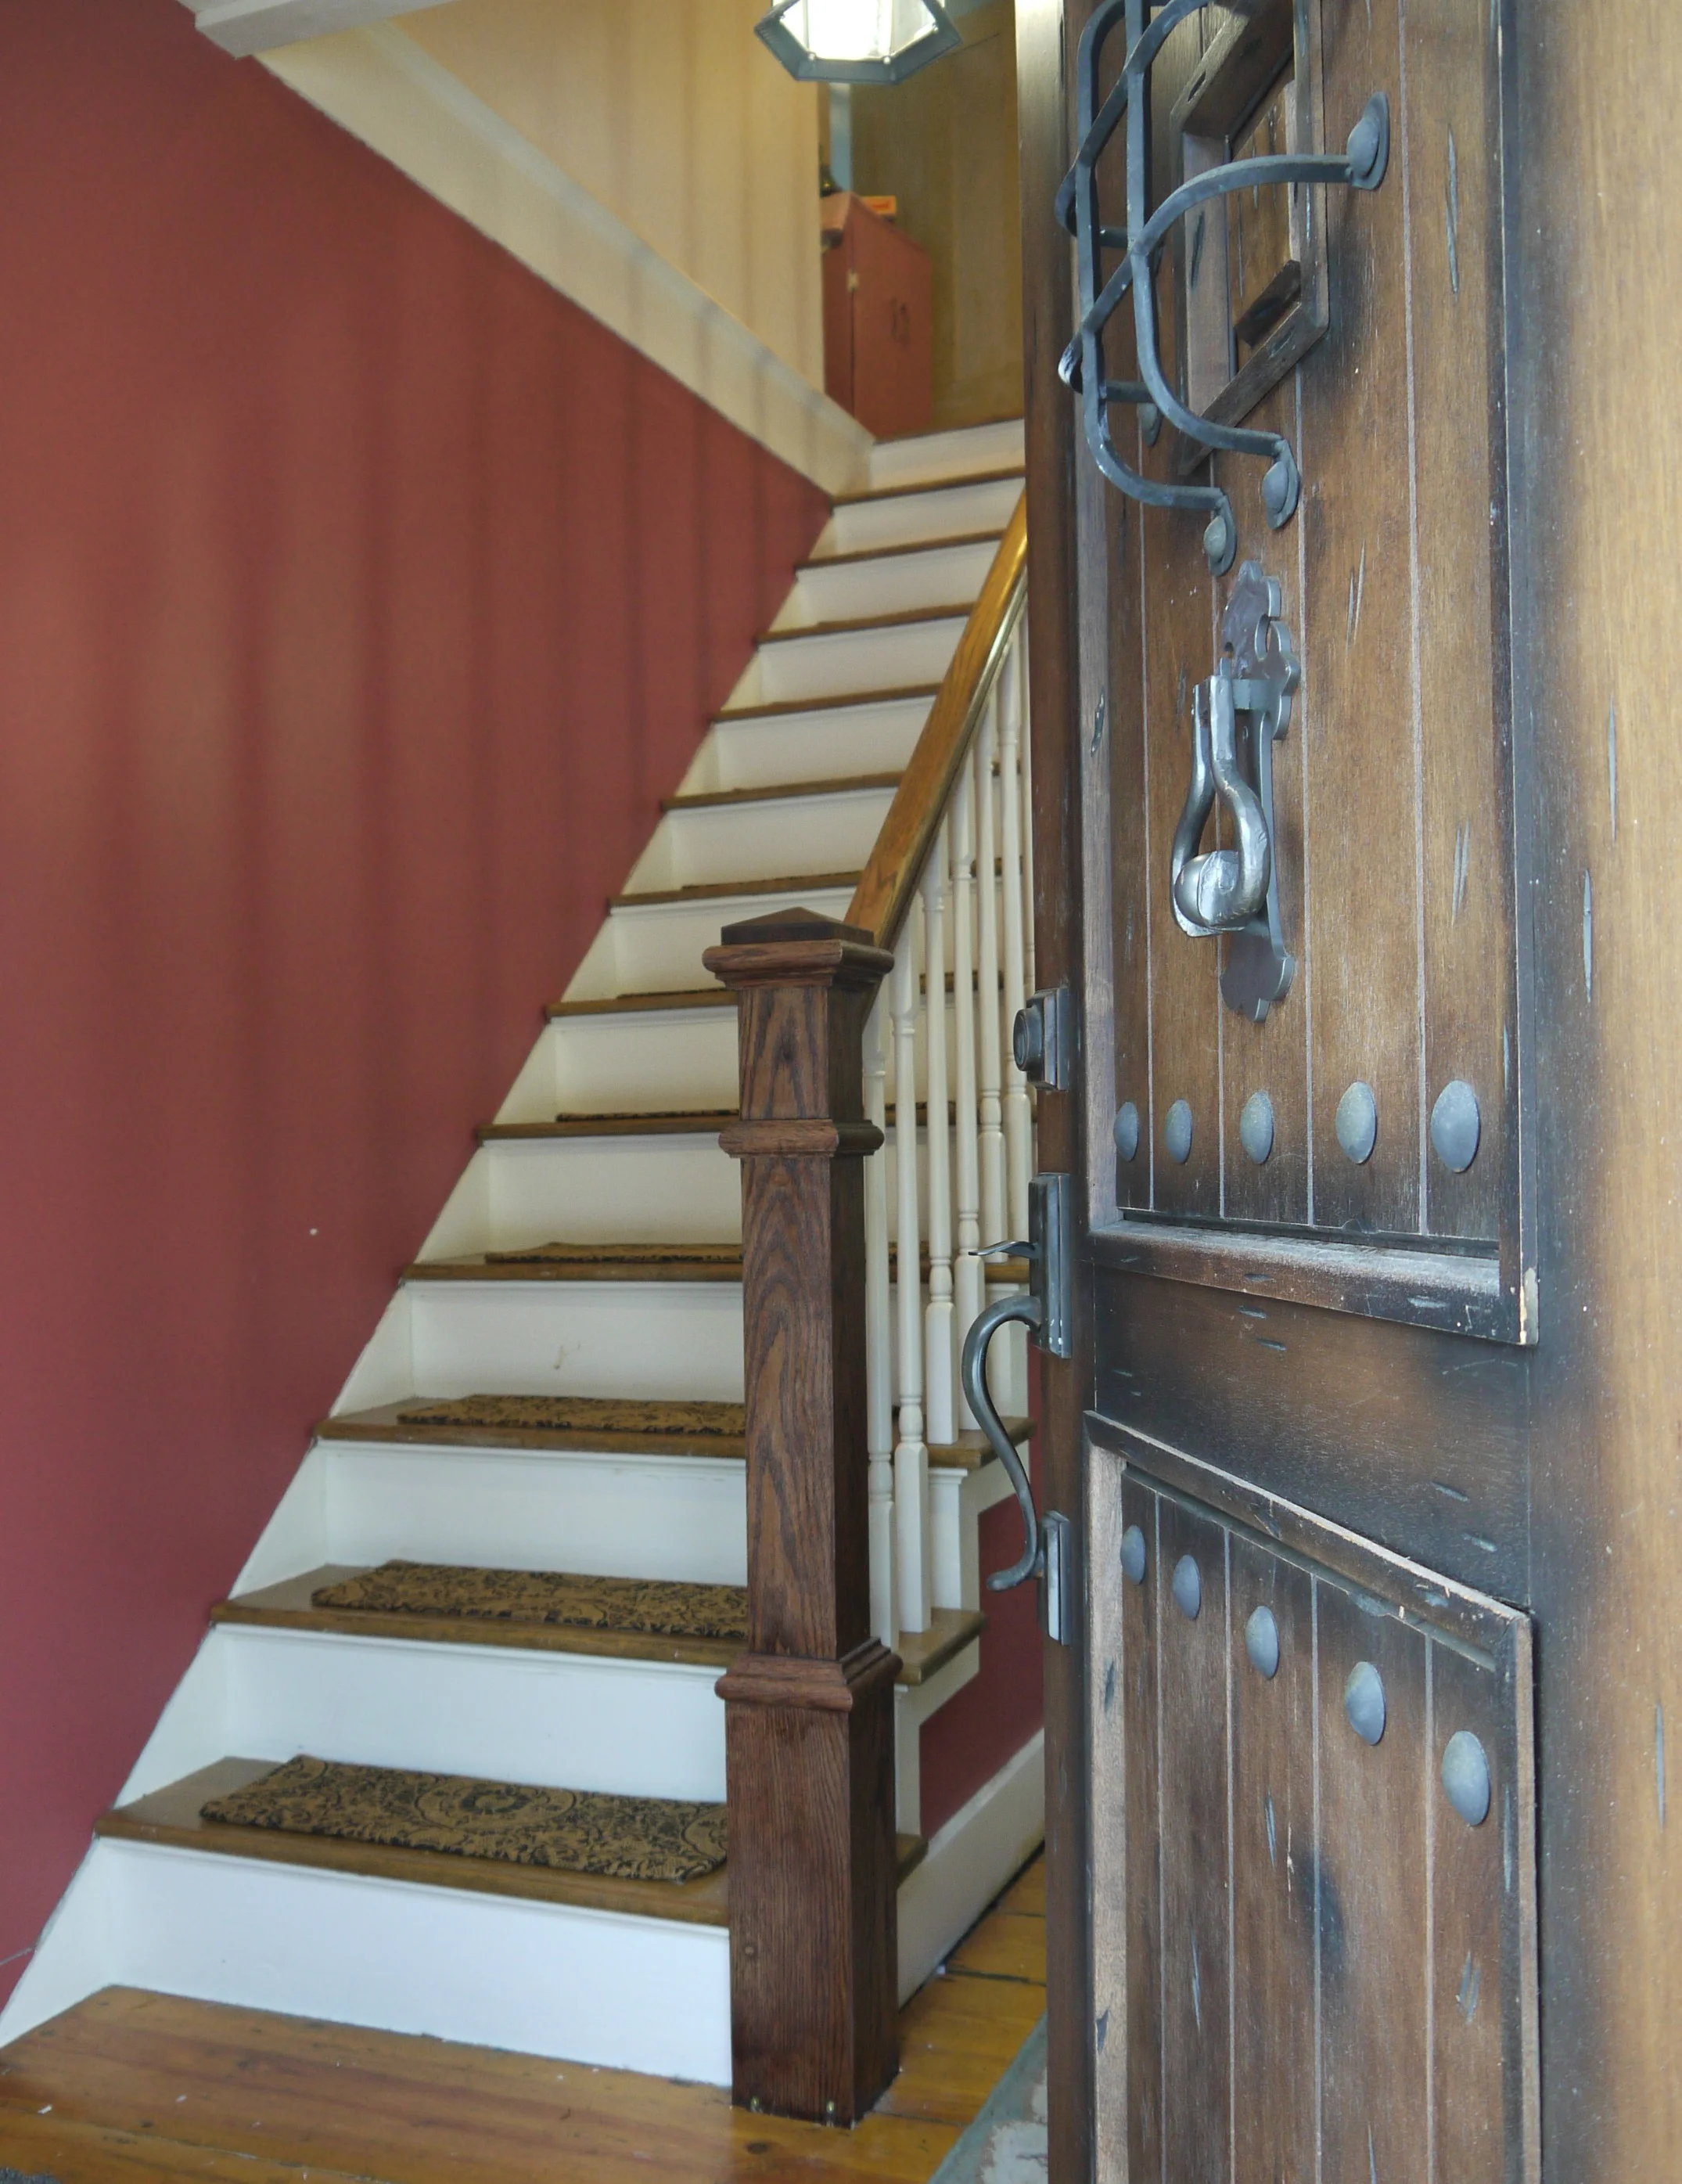
This is what the set looks like on the stairs.

Stairway Makeover 2
Make Your own Carpet Stair Treads 3

There are still a few details to take care of in the front hall but it's come a long way from what it looked like the day we bought it which was this

  1. So here are my suggestions if you should decide to make your own carpet stair treads. 
  2. Make sure the fabric you choose to use is a sturdy, heavy duty fabric such as an upholstery fabric. It also should be think enough that the glue won't ooze through because that would make a hard stiff top on your DIY carpet stair treads, and that would feel awful if you were barefoot. 
  3. Use a sticky tape like duct tape
  4. Use plenty of glue. 

Over all this project took my daughter and I two and a half hours. Here is a break down of what we spent. 

  • Fabric $14.97
  • Glue $17.97
  • Carpet pieces $7.00
  • Tape $3.49
  • Carpet Tape $3.50
  • Total:  $46.93    I think we may have been able to do this for a bit less if we had shopped around for a larger bottle or different glue. But overall I'm happy to not have spent a few hundred. Another thing which I considered using and you may want to try is, to use burlap to cover the carpet pieces and then use some geometric shape and acrylic paints to put maybe stars or stripes or some other design on the pieces.

Let me know if you try this project. I'd love to see pictures.

Blessings,

Shelley

UPDATE:  

I have had soooo many questions asked about these carpeted stairtreads so I thought I would add an update. Just over a year after I made these, we sold the house. So, unfortunately I can't tell you much beyond 1 years wear. However, I can tell you how they held up through that year with a family of 6 and 3 large dogs. They held up AMAZINGLY well! I did not think to take a photograph of them before we moved. However, I do have the realtor photo. Unfortunately it isn't the clearest photo for zooming in. But I can tell you they looked good enough that I didn't feel a need to do anything with them except vacuum in order to show and sell the house, I think they made the front hall look very pretty. The realtor photo is below. To answer some of the specific questions I have been asked:

  1. No I did not use scotchguard. I used an upholstery grade fabric to make them and it may or may not have had it already...I don't know. 
  2. No, the fabric did not pull up when I vacuumed, they just stayed put. Others who make these may have a different experience than I did however as I can think of a couple things which may or may not change the outcome (type of fabric used, how well it is glued down, type of glue used, type of rug being covered).
  3. No my vacuum did not pull up the threads. Again, I can imagine some people having a different experience based on the chosen fabric. If you decide to make these, make sure your fabric is not made up of many "threads" being sewn down onto another piece of fabric. Many chenile type fabrics are made this way, they appear durable but they are not. 
  4. They stayed in place perfectly!  That carpet tape stuff is pretty great stuff. In the year we used them, I didn't have to redo the tape on any of them. 
  5. Yes, I would make them again and may possibly do so in my new home. 
Make your own carpeted stair treads

Weave a Scarf for Your Valentine

Valentines day will be here before you know it so it's not to early to begin thinking about what you want to give to your valentine. If you're looking for a great, handmade project, I have just the thing. This is easy, really. I am a weaver and have a large floor loom but this project does not require any such special equipment. Even your children, if they have some "sticktoitiveness" to finish a project can do this. 

Here's one of the scarves I made using this technique.

Weave a scarf

I want to apologize right up front for the quality of the photos in this tutorial. I tend to do many project in the evening while we are watching a movie or something. I'm like that, can't sit still and just watch a movie, have to be doing something. But it's always difficult to get good photos at that hour of the day. 

The first thing you are going to need for this project is yarn. For this project, I used three different yarns. Two of which I had in my stash which were rather fine in diameter (you can see in some of the photos) but the third one, was something I found in a markdown bin. It really was meant to be used in a different manner than I used it (in order to see the pretty lacyness), but I tried it out for this technique and I really like how it turned out. 

I can't really tell you how much yarn you need because it will depend on many factors such as how tightly you weave, the bulkiness of your yarn, the length and width of your scarf, the length of your fringe, etc. I used approximately 1  1/2 skeins of the colorful yarn and approximately equal length of the other two. 

handmade valentine gift

The second thing you are going to need is a board, yup, any old board. Well, truthfully, it should not be too "rough cut" because the yarn snagging on the "roughness" will drive you crazy, but other than that, any old board will do. I chose a board which measures 6 1/2' x 8". It's just a pine board I found in the barn which was left over from a house project. You do have to make sure the board is long enough to make the length scarf you desire. Make sure to include the fringe length when determining your length. It is best to measure a scarf you currently own to determine your desired length.

Once you have selected your board, hammer a row of nails on each end of the board. You don't have to be too fussy about spacing. I nailed 7 nails on each end of my 8" wide board. I placed one approximately in the center, one on each edge and then spaced two somewhat evenly in each space. For nails I just used whatever I had in the barn, rust and all.

valentine scarf 2.jpg

Next you are going to warp your "loom" (your board). The warp threads are the threads which will run the length of your board, the ones you will weave on. You have to choose one of your yarns for the warp. Whichever yarn you choose for the warp will also be the fringe, so think about what would like nice for fringe at the ends of your scarf.  If you want more than one of your yarns for fringe, I will address that in a moment. 

Take one of your yarns and tie it onto one of the nails at an edge. Then run the yarn down the length of the board to the nail at the other end. Run the yarn around the nail and back to the other end. Do this back and forth until the width of the board is covered with warp threads. Back and forth, and back and forth, when you are done it should look like this:

warp for a scarf

I mentioned before how you can use more than one of your yarns for your fringe, here's how you can do that. I decided that the warp I had on my board was going to make for boring fringe and wanted to add more warp threads. You can either use one yarn as I have shown, or you can completely warp right over this yarn with a second yarn, or you can do what I did. I took another yarn and warped just a few threads by tying the yarn on one nail and running it to the other end and tying it off. I did that on every other nail rather than run it back and forth over the whole board. You can tie a different yarn on each nail and change it for every nail or run the same yarn back and forth, whatever strikes your fancy. Boy, this is a hard thing to explain so feel free to ask any questions.

If you decide to warp with more than one yarn, when it comes time to weave, you will just treat the doubled up warp threads as one thread. 

Like a knucklehead I forgot to take a picture when I had the board entirely warped with the other yarns but you can make them out in the next photo. 

Next you need to find something to use for a shuttle. I used a bobbin from one of my shuttles but If I did not have this I would just use a piece of cardboard, that would work just as well. You need something which you can wrap the yarn around, it will hold the yarn as you pass it, over, under, over and under the warp threads. I chose to do my weaving will all three of the yarns which I was using treating them as though they were one yarn. The other way to do this is to weave with one yarn, then switch and weave with the next yarn which would create a scarf which has a section of color at one end, then a section of a different color further down the scarf. You really have to think out your project in advance. I wanted my scarf to look consistent the entire length so chose to weave with the same yarns for the entire length. I hope this all makes sense.

When you fill your "shuttle" with yarn, you want to put on enough so you don't have to keep filling the "shuttle" as you weave. or have to change yarn constantly while you are weaving, however, don't fill it so much that weaving over and under the warp threads is going to prove to be difficult from it being too bulky.

Now start weaving. Decide how long you want your fringe and start your weaving approximately that distance from the nails. When you get to the end of the row, go around the edge yarns and go back across in the opposite over, under pattern. When you switch directions at the end of a row make sure not to pull in your edge to tightly. Your edge is called you "selvage" and if you pull it too tightly the selvages will pull in for the entire scarf length, you don't want that. 

You will have to decide how tightly you are going to weave. What I mean is, how tightly you are going to weave one row up against the last row you wove, Whatever you choose you need to be consistent the entire length of the scarf. I chose to weave fairly loosely. Here's a few things to keep in mind:

  • Looser weave makes the inches add up faster.
  • Looser weave may require some hand stitching when you are done weaving in order to "hold" or "tack" your woven rows somewhat in place so they don't "slide" around to much on the warp threads. This will be especially important if you weave with anything "ribbon" like or silky textured which wouldn't "hold" to the other yarns well.
  • Tighter weaving will use more yarn and will take longer but will "stay where you weave it" better.

After you have woven quite a bit, you are going to run out of yarn on your shuttle. How you handle this will depend on how tightly you are weaving. If you are weaving your rows tight together, simply weave your yarn right to the end of the yarn which is on your shuttle, then start the next yarn right where the last one left off only overlap the ends of the yarns by a few inches and then keep on weaving. If you are weaving loosely, you will have a bit more work to do at the end but I usually weave loosely when I'm using my board loom. Here's what you do if you are weaving loose rows: weave all the yarn on your shuttle except when you get close to the end you want to leave a couple inches loose, then just take the end and lay it down over the finished part of the scarf (like in the photo below). Then start the next yarn where you left off on the last yarn and leaving a few inches, leave that end lying down with the other end. You will deal with all these ends when you are done with all the weaving. 

The second photo did not come out very well and I apologize but I think you can get the basic idea.

I had to fill my "shuttle" 3 times to weave the length of the scarf. 

When you are done weaving, it is time to deal with any ends you may have hanging loose. This is going to be difficult to explain so bear with me. This is easiest to do with the scarf still on the board. Take one of the ends which you left hanging loose and cut it so you only have about 2" to deal with. Without messing up your rows of weaving too much, with your fingers gently weave the end into your weaving by tucking it in. Then take the end of the other yarn and weave it in also by weaving in a continuous pattern as the first end as though they are one yarn. You want the ends to overlap each other by about 2" or so. Then take a needle and  some thread in a color which won't show on the yarn and stitch a few tacking stitches. You want to make sure your stitches go through both yarns. Do this for each of the ends you have to deal with. If you don't do these tacking stitches and you wove loosely the ends are likely to unweave themselves over time. 

 After you deal with any ends, you have to decide if you think the weaving is going to "slide" up and down on the warp threads while it is being worn, and if that is something you want to prevent or not. I felt this scarf may do that. To prevent the sliding I stitched a few taking stitches in various places up and down the length of the scarf. Again, this is easiest to do while the scarf is still attached to the board. If you think it would be nice, you could stitch on a few buttons, or other embellishments when you do these tacking stitches.

Once you are done with any tacking stitches, you are ready to remove the scarf from your "loom". Simply cut the warp threads as close to the nails as you can. 

Once you have the scarf off the loom you have to do something with the fringe so your weaving does not come undone at the ends. There are many ways to finish the end of your scarf, I will tell you the easiest. First, you can either machine or hand stitch right across the last row of weaving. This will hold everything in place so your weaving will not come undone and will leave your fringe looking pretty much just like it did when you cut it off the loom. The other thing you can do is take a couple of the fringe threads and tie a knot right up next to the scarf, Then do this with all the fringe across each end of the scarf.  This also will hold the weaving in place. If you choose to do this make sure when you tie your knots that you take threads from each side of the weaving when you tie them or the weaving will still come undone. If you look at the end of the weaving you'll see what I mean by "each side".  I finished this scarf with the knot tying technique, you can see it in the photo below.

weave a scarf 1.jpg

I've made a number of scarves using this board loom, here's a picture of another one I did. I sewed some vintage buttons on this one when it was done. 

This is my daughter and I giving the scarf the "is this soft enough to have by my face and around my neck test". Yup, it passed the test. 

weave a scarf 2

Enjoy your weaving adventures!

Make Your Own Paperwhite Bulb Kit - Win One Too!

There is a give-away at the end of this post to win one of these lovely Paperwhite bulb Kits. There is also a link to a PDF of the tags for these gifts.  Enjoy.

Twice a month a bunch of us ladies (both older and younger) get together. We share from Scripture and have bit of devotional time and then we get down to some serious creating! Last nights projects turned out BEAUTIFUL!!!

With Christmas fast approaching I planned the project to be something which could double as a gift. We made Paperwhite Bulb Kits. 

flower pot 2.jpg

To make these here's what you will need:

  • Plain terra cotta pots (I paid about $1 each for mine at Home Depot)
  • Acrylic Paints
  • Misc. papers to cut up if you want to use any of the images such as magazines, wrapping paper, etc.(greeting cards may be too thick). 
  • Glue (regular old Elmers or school glue)
  • Paint Brushes
  • Potting Soil and bags to put it in
  • Bag of Paperwhite (Narcissus) Bulbs and smaller bags to put them in. The regular price on these was $14.98 for 15 bulbs but they were on 50% off clearance at Home Depot, it's late in the season for bulbs so you might be able to find them discounted at your local store as well).
  • Lacquer or other sealer (I used a spray, quick drying lacquer)
  • Cellophane to wrap it all up or a gift bag to put it in and, ribbon

First, paint the pots with a coat of acrylic paint. You can either paint the entire pot one color or paint the top rim a second color or even paint stripes, whatever you wish. 

flower pots 1.jpg

Then when the coat of paint is dry (it dries very quickly) put on a second coat if it is needed. If it isn't needed, you can just start decorating. You can add decoration with other colors of acrylics painting with reckless abandon, or if you are more of a reluctant creative, you can use pictures cut from magazines. Either way they turn out lovely. In the above photo, the flowers on the front pot are from magazines and the black and white scroll type design on the pink pot is from wrapping paper, see how easy this is? Cut your pictures out, trimming very closely. Then on a paper plate put some glue and add water to it to water it down. Using a paint brush, put the watered down glue on the back of the image and put it in place on the pot. Then brush the watered down glue all over the image (decoupage like). Don't worry, it will dry clear. You can also use Mod Podge for this but if you don't have any on hand, don't go spending money you don't have to, the glue works just fine.  For the polka-dots we used pencil erasers or q-tips, either works.

flower pots 6.jpg

For the words, we used rubber stamps dipped in acrylics or we just painted the words on with a paint brush.

flower pots 7.jpg

After you have your pot looking like you want it to, put on a coat of some sort of sealer. If you only used acrylics on your pot, you may not need to do this step, but if you used any paper embellishments, definitely put on a coat of sealer. This is what we used:

P1070131.JPG
P1070118.JPG

While the sealer is drying you can bag up your potting soil. We used 1 Gallon Zip Lock Bags. Scoop in enough to just about fill the pot and seal the bag. 

P1070132.JPG

Then put your bulbs in a bag and print the tags. I made a PDF for you to print the tags which we used. The first two pages are the header tags for the bags of bulbs. There are two versions because I had small zip lock type bags on hand and they measure 4" wide by 7" tall (header card for these is on page 1 of PDF). Because most of you probably don't have those bags on hand, I made a header card which fits on a quart size zipper bag (pg.2 of PDF). The other two pages of the PDF are the planting instructions for you to include in the pot and the tag for you to tie on the outside of the gift. Print everything on cardstock if you have it.  Paperwhite Bulb Kit PDF here.

P1070125.JPG

After the pot is completely dry you can put everything together. Put the potting soil bag in the pot, set the bag of bulbs on top of that,  and put the card with the instructions in the pot. If you have cellophane on hand cut a long strip about twice as wide as the pot and long enough to tie together above it. Tie on a bow and the tag and then tape the edges. That's it, you have a lovely handmade gift.

If you have never grown paperwhites, you should give it a try this winter. It is just lovely to have beautiful blooms filling up the house in the dead of winter, they take 4-6 weeks to bloom so get them started now, come January you'll be so glad you did.

P1070119.JPG
P1070129.JPG
P1070124.JPG
P1070122.JPG
P1070137.JPG

Now for the give-away...I made this lovely one so one of you lucky folks can enjoy your very own paperwhites come January.

flower pots 11.jpg

The pot is a lovely bright red painted with glittery snowflakes. It comes complete with potting soil, bulbs, and instructions. It's all wrapped up in cellophane with a bow ready for you to enjoy yourself or give as a gift. 

flower pots 10.jpg
flower pots 13.jpg
flower pots 9.jpg

There are two ways to enter the giveaway, first, you can leave a comment below stating if you plan to grow these yourself or give the kit as a gift if you win. The second way to enter is to "like" the new Because Liada facebook page at www.facebook.com/becauseliada.  All commenters and facebook "likes" will be entered into a hat and one winner will be drawn on December 10th, 2013.  I will pay shipping for the Paperwhite Kit to anywhere within the continental United States. I will ship it elsewhere but the winner will have to pay shipping (via paypal) for locations outside the continental United States. Winner will be drawn on December 10th, 2013.

UPDATE:  We drew a winner late last night and the winner has been notified. Once, they respond, we will announce the winner. Comments are being left on for this post in case anyone wants to comment on the tutorial, however, no additional comments will be entered in a drawing for the set. Thank you to all who entered. 

Follow on Bloglovin

This giveaway was listed at the following locations:

Giveaway Directory

Check out what else you can win.